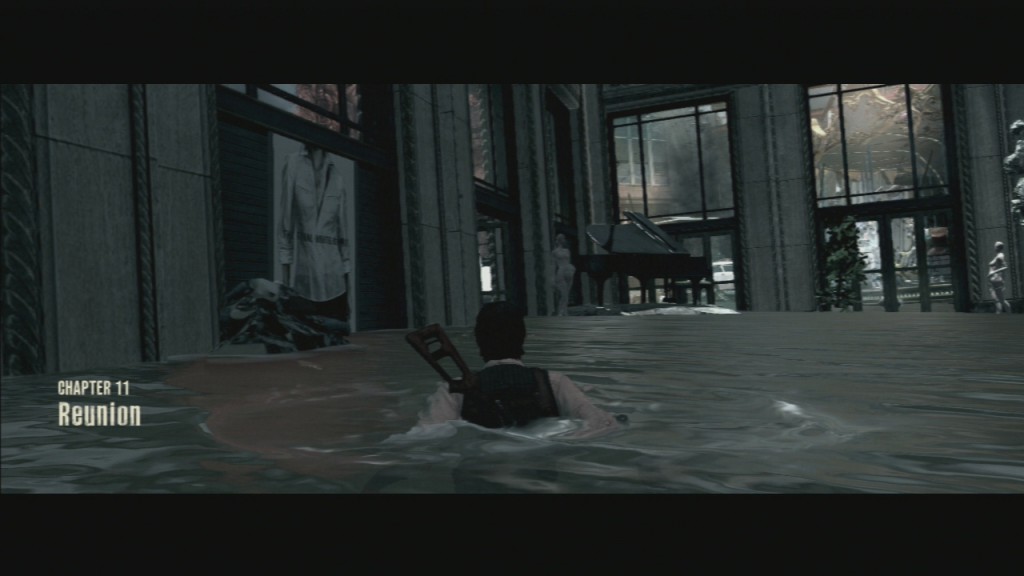
Chapter 11, Reunion, takes place in the city. This creates a really nice change of pace from the previous chapters.
▼Article Continues Below▼
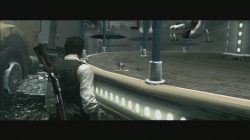
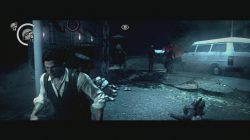
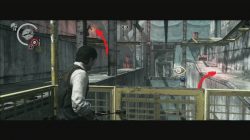
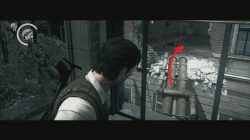
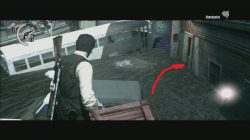
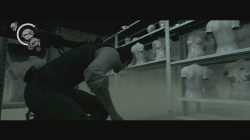
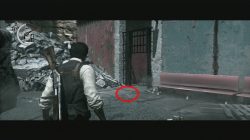
There is also a feeling that there is much more shooting going on. Stone statues that give keys are positioned at the funniest locations. Don’t even get me started about the new type of weapon that one shot kills monsters and about meeting new types of enemies. You might think that this far in the game you won’t be seeing a lot of new stuff, but you would be gravely wrong. Truly amazing work.Leave the building, you find yourself in at the beginning, and look to your right. There is a carousel there. On top of one of its horses you can find the first Key Stone Statue so shoot it down. Get close to the carousel’s edge and collect the key.
Key Stone Statue Location.
Once you shoot it collect the key.
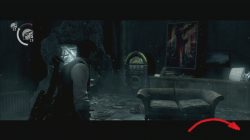
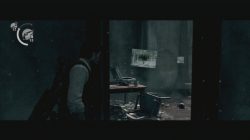
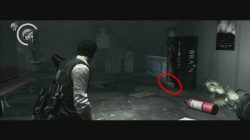
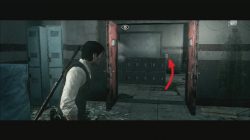
Further down the road you’ll come across the first door. Entering that door and another one after it you’ll arrive inside a room with an old Jukebox, two sofas and a large poster… As you enter this room turn right. Inside the next room there is a metal suitcase on the table. This box contains a new weapon – Magnum gun! On the wall of the same room there is Map Fragment 21. Take them both and continue.
Once you enter this room turn right.
Inside the next room is the Magnum case and Map Fragment.
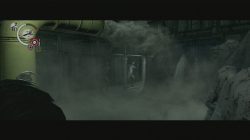
Old-Fashioned Key Area
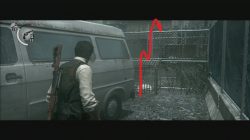
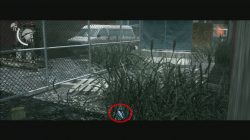
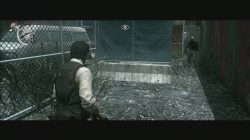
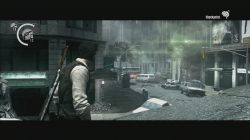
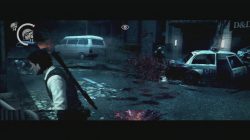
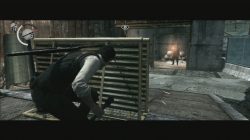
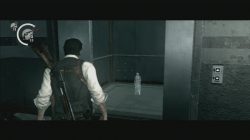
The next important area is full of metal fences. One of the monsters that hiss at you is behind one of these fences. Every unavoidable action in this game creates a reaction, and in this case that reaction is a wave of monsters coming after you.
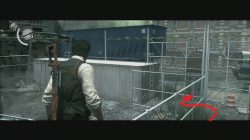
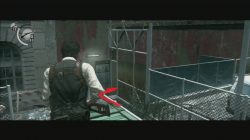
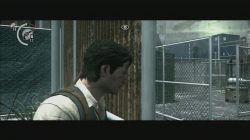
Behind a van you can climb over the fence. Doors that lead to the platform with the bus on fire are locked. As you try to open them you will actually cause another door to become unlocked/open. This door is close to the van you jumped over a minute ago. As you reach the end of this area you should collect Key Item History: “Old-Fashioned Key” .
Jump over the fence.
Try to open this door.
Enter this part of the area…
… to collect Key Item History.
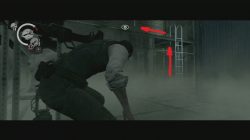
This item unlocks the door close to the bus on fire, but before you reach this door you will have to defeat several waves of monsters. Two of those waves will have of a new type of enemy among them. They are monsters in SWAT gear and they carry auto rifles and also wear bullet proof gear. Their weak spots are their legs/knees. Magnum also penetrates their protection. SWAT geared monster pauses in between his shooting sprees. Once he starts shooting toward your location he doesn’t move his scope as you move. Use this fact against him. Kill ’em all and go through the door.
The first SWAT geared monster comes right away.
The second one is on the container near the door.
Fish Monster
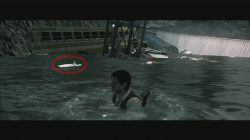
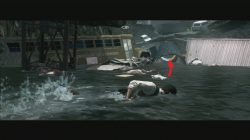
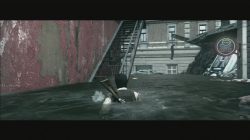
In the next area you find yourself swimming. There is the second Key Stone Statue inside this pond. It floats among other stuff in there (dead bodies and stuff). In order to grab this key you have to swim and push this Stone Statue through water toward a nearby large pipe. Do not, I repeat, do not guide it toward the nearby metal pillar. It can get stuck there and you won’t be able to pick up the key. As you reach the giant pipe you can destroy this Stone Statue and collect the key. At this point the game also gets saved. If it saves and you haven’t collected the key yet and you die later on – when the game gets loaded at this spot you have to jump back into the pond and guide the key statue back to the pipe to collect it again.
Key Stone Statue.
Guide it toward the next auto save point.
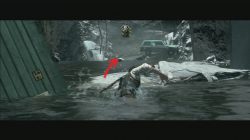
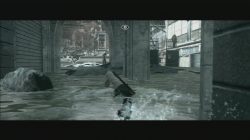
Next pond hides a fish like creature. This creature always goes to the side of the pond where something makes a sound or drops into the water. Make it go to the side of the pond opposite of you by shooting the water there. Once the fish is on the other side shoot the water closer to your location. Fish monster will start swimming to where you shot the water and it will take it a while, so use that time to jump into water yourself and swim across. By the time the fish monster checks out the place you shot at and then goes on to investigate your own splash you should be able to reach the other shore. Keep going until you reach a safe place.
Fish monster checks out the disturbance in the water.
Shoot down the bodies from above or just shoot at the water with your gun to be able to avoid the fish.
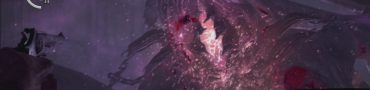
Ruvik’s Copy Fight
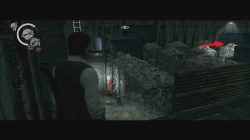
The first major combat starts soon. A copy of Ruvik summons a large number of monsters you have to defeat. This copy of Ruvik can’t be damaged with headshots. Focus fire on Ruvik’s copy. Once he is dead all the other monsters die as well. Scout the area for another metal suitcase. If you have missed the Magnum at its previous location you can find it here now.
Area where the combat starts.
Large group of monsters.
Ruvik’s Copy Special Attack.
Another weapon/ammo metal suitcase.
Entering the next building you are sucked into the Hospital’s Main Hub. There is lore to be collected, like Newspaper: “Body Found in Sewer” and Missing Person Posters: “Inspector Brown”. Leave this zone and the platform that has taken you there.
Three part event combat
The next major combat area is where you’ll find yourself in soon. It consists of three events. The first one begins as you come close to the cage with many monsters in it. Underneath this cage is a door that they go through in waves. Once they are defeated climb to the second floor and continue going forward.
Three part event combat.
Monsters with explosives and torches are number one priority.
Use the stairs.
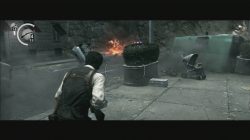
The next event starts as soon as you start the generator. Use a grenade as soon as possible and throw it toward the incoming wave of monsters. This is just an easy warm-up for the final combat event.
Use the generator.
Throw a bomb at the incoming monster wave’s location for an easy kill.
The third, and final, event starts as you step inside a metal gondola. This gondola takes you to the other side of the building. On your way you get attacked by a large number of monsters that come from two sides. To survive this phase pay attention on a couple of things. The first two monsters comes from your left and they throw axes. Next monster to kill is to your right. SWAT monster drops down from the second floor. Place an explosive bomb here as you need to focus on the next monster. This one comes from your left on the second floor. This monster carries a torch that he likes to throw at you. These are your number one priority monsters to kill. If you survive this part, there are only a couple of monsters left. One of them carries a torch and comes from the second floor to your right and another one comes from the first floor to your left.
The first group of monsters come with axes and to your left.
Place a bomb at this location to your right and kill the torch monster on the second floor to your left.
One more torch monster to your right, second floor.
The last torch guy is once again to your left. This time on the first floor.
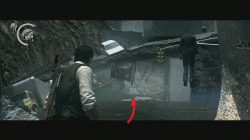
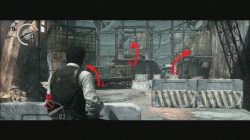
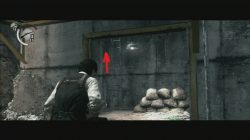
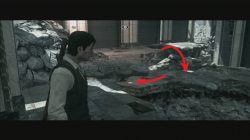
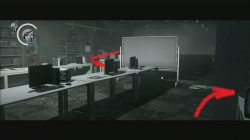
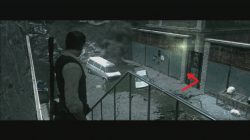
When you reach the end of the line with metal gondola you jump down. From this location you can see the next Map Fragment – Map Fragment 22. It is below the platform from where you jump down next.
Map Fragment 22 Location.
Saving Kidman
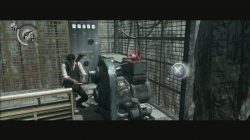
You’ll get to a metal pipe bridge that connects two buildings next. As you enter the next building you can notice a soda vending machine. Use it a couple of times until it gives you the third Key Stone Statue. Watch yourself because the same soda vending machine can release a bomb as well.
As you walk over the pipe bridge.
Use the soda vending machine until it drops the Stone Statue.
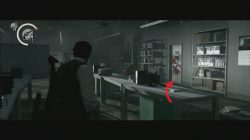
The next room is filled with desks. In the corner of this room you can find an Audio Tape: “Searching”. Inside the same room you can find the blood signed door. Behind this door another lore item – Personal Document: “Journal Entry – July 2012”.
“Lore” Door.
Audio Tape Location.
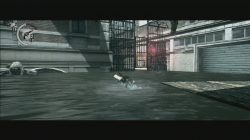
Leaving the building you come in contact with the first member of Reunion group – Kidman. In order to reach his location you have to go through the water. This water has the fish monster roaming around. Shoot the water across from where you have to go to lure the fish away. Swim toward the gates that open for a short time. Use the stairs now. At the end of the platform kill 4 monsters across you and one bellow you. Get back to the stairs now. Lure the fish away from you. Swim and keep to your left. Climb on top of the first car now. Shoot the water twice to lure two fishes away from your position. Swim toward another gate and you’ll reach the final stairs now. They lead to Kidman. Kill the monsters inside and go near the door where Kidman is at.
Shoot at the water away from the door to lure away the fish.
If you climb the stairs…
… you can shoot down four monsters near Kidman and the one with a sniper bellow the platform.
As soon as you enter the water from the stairs you’ll get chased by monster fish. Hide in this area and climb the car.
The second metal gate door.
After you saved Kidman you’ll reach a room with an elevator inside. Call it and grab the next Key Stone Statue.
Use the elevator switch.
Key Stone Statue Location.
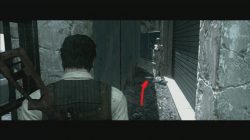
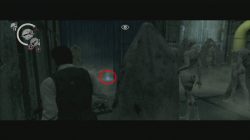
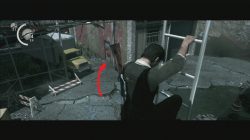
When you go through the next gate, turn left. At the end of a narrow hallway, punch a doll to be able to collect the Map Fragment 23. We would like to thank user cYcLoNe for additional information.
Turn left here.
Map Fragment 23 Location.
Doll Factory
Road is rather straight forward from here and it ends with two cutscenes. You’ll end up in a doll factory. This factory is full of flammable gas. Don’t use any guns or weapons that can cause a fir. Instead, use the bottle to sneak past two harpoon monsters and reach the ladder at the end of the first part of the factory.
Use the hole in gondola retail to sneak through.
Use the ladders.
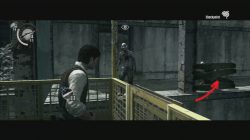
At the end of the metal platform, you have climbed to, is where you jump down into another part of the factory. There is a Gas Pipe Valve you can use to turn off the gas, or you can simply stealth kill the monsters with Agony Bolts. Inside the blue cargo container there you’ll find a Key Item History: “Factory Keycard”. This item is used in the same area to open the metal gate that lead you to a passage that takes you to the ladder leading you outside of the factory.
From the platform you can notice History Key Item and the keycard pad.
Keycard location.
Turn off the gas if you want.
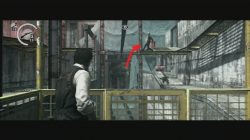
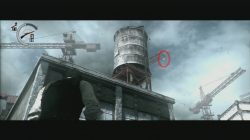
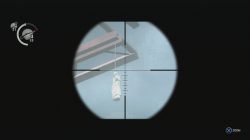
When you leave the factory you are in an open area once more. Look up. In the distance you can notice three tower cranes. At the end of one of their its working arms you can see a Key Stone Statue hanging. Shoot it with a sniper. Later on, as you go over the improvised metal bridge, you can pick up the key that fell from the statue. On your way to the end of the chapter you come across another Bloody Sign Door with additional lore like: Personal Documents “Journal Entry – August 2012” and Newspaper “Investigator Missing”. Once you collect the last key and climb the stairs this chapter is done.
Chapter 11, Ruvik copy. Easiest way to kill him. You don’t need to waste any ammo, or kill any badguys. Wait for everyone to spawn, then run away and avoid them all until you have Ruvik copy in front of you. Shoot him with an electric agony bolt, then throw a match on him. After he’s dead, all the badguys die too. Then all you have to do is collect your gel. When I did it, I didn’t even lose any life. 🙂
And alternative way of dealing with the fish creature.
You can save ammo and shoot the bodies hanging over the water when you confront the fish creature (I’m assuming that’s why they are hanging so conveniently in certain places) . It takes one shot, or two depending on the area and where you need to go. In the final area (with Kidman trying to hold the doors closed) with the fish creature, you can climb the stairs, shoot the haunted with the gun at the far left of the area (by the raising door) to save yourself from being shot at when you swim, and to give the creature something to gnaw on while you go for the door in that last segment.
 Leave the building, you find yourself in at the beginning, and look to your right. There is a carousel there. On top of one of its horses you can find the first Key Stone Statue so shoot it down. Get close to the carousel’s edge and collect the key.
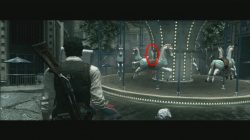


Chapter 11, Ruvik copy. Easiest way to kill him. You don’t need to waste any ammo, or kill any badguys. Wait for everyone to spawn, then run away and avoid them all until you have Ruvik copy in front of you. Shoot him with an electric agony bolt, then throw a match on him. After he’s dead, all the badguys die too. Then all you have to do is collect your gel. When I did it, I didn’t even lose any life. 🙂
Easiest way to defeat the Copy is an Icebolt, 1 hit and he dies, also everything he spawned.
map fragment 22 located after the gondola ride,right under where u drop down from the small ledge
And alternative way of dealing with the fish creature.
You can save ammo and shoot the bodies hanging over the water when you confront the fish creature (I’m assuming that’s why they are hanging so conveniently in certain places) . It takes one shot, or two depending on the area and where you need to go. In the final area (with Kidman trying to hold the doors closed) with the fish creature, you can climb the stairs, shoot the haunted with the gun at the far left of the area (by the raising door) to save yourself from being shot at when you swim, and to give the creature something to gnaw on while you go for the door in that last segment.
You can kill Ruvik’s copy with two magnum shots and setting him on fire when he falls to the ground
After you saved kidman when you enter the metal door on the street turn left. Next to the doll there is another map fragment.
There are 5 statue here lol you even state them XD