Home » Thief » Thief Collectible Treasure Locations Guide
The best thief is the one that steals every single valuable object available to him or her. That’s why finishing the new Thief reboot without getting 100% in the end is not an option!
▼Article Continues Below▼
This guide will help you find all collectible treasures in the game with the detailed explanation where and how to get them.
WARNING: Spoilers!
Due to the nature of the game and how this guide is created, please have in mind that this page contains some spoilers, which could greatly ruin your experience. Spoilers will be avoided as much as possible, but please, continue at your own risk.
Prologue: The Drop
Collectible Treasure #1:
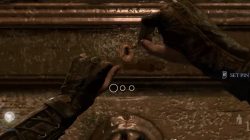
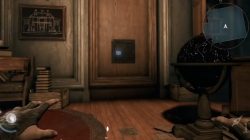
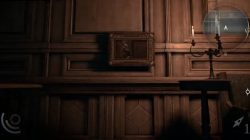
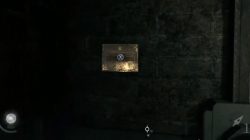
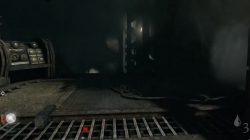
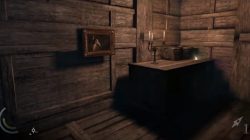
The first collectible treasure is unmissable as the game’s story will lead you towards it. It’s right behind the framed painting.
The first collectible is behind the picture
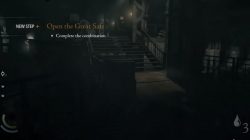
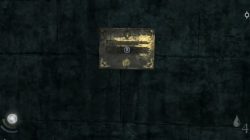
After opening the safe, it’s all yours
Chapter 1: Lockdown
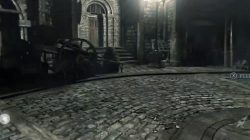
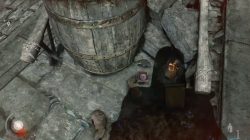
Collectible Treasure #1 – Serendi Stone Circle #1:
After the cutscene at the beginning of the first chapter (the one zooming in on the tower in the background), jump down to the street level and go left. Look for the cart parked on the street and the collectible will be places right next to the barrel.
The first collectable is on the side of this cart
…and next to the barrel
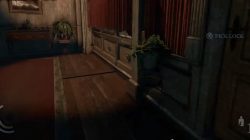
Collectible Treasure #2 – Client Loot #1:
When you enter the Stonecutter’s Court, pass the two guards down the street and enter the store to their left. You will have to lock-pick the door. There will be one guard, proceed and turn right. Collectible treasure will be inside of the center cabinet, beneath the red drapes. You will have to lock-pick it, too.
Collectible is located in the middle cabinets
You will have to pick the lock
Collectible Treasure #3 – Mortal Coils #1:
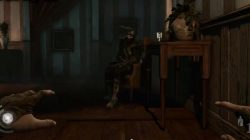
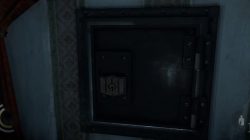
The next one is located nearby. Enter the back room of the jewelry shop, the one with the guard who is sleeping on a chair. Collectible is inside of wall safe which you will have to lock-pick to open.
You can take out that guard
Lock-pick the safe
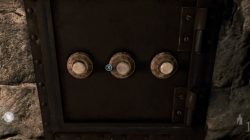
Collectible Treasure #4 – Unique Loot #1:
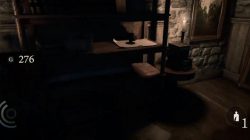
The last collectible treasure that can be found in this chapter is in the same shop. Go to the basement and in the back left corner, look at the painting to hiude hidden switch. The code that you will need to unlock the safe is 739.
The room in the basement of jewelry shop
The code for the safe
Chapter 2: Dust to Dust
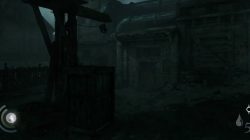
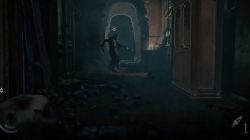
Collectible Treasure #1 – Memories of the Dead #1:
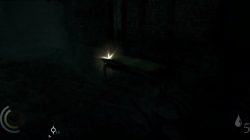
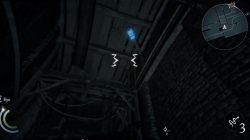
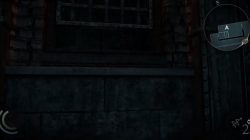
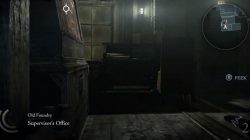
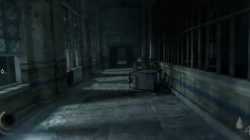
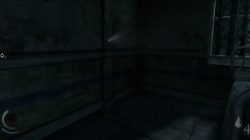
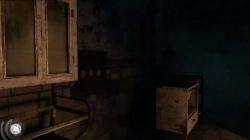
When you enter the Old Foundry courtyard, look for the crane and climb it. When on top of it, jump over to the roof. Go to the right and sneak under the pipes until you reach open hatch. Go inside and check out the desk.
Clim the crane on the left
As soon as you are inside you will see the collectible
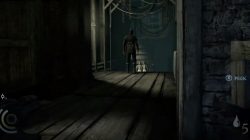
Collectible Treasure #2 – Flowers Eternal #1:
You will need a rope arrow for this one. Walk through manufacturing area, enter the hallway with two guards, there is a wooden scaffolding with the treasure. You will have to take of the guards, use rope on the ceiling, then climb the rope and jump on the first platform, then jump to the one next to it.
First take out the guards
After you use the rope, climb the wall to the right
Collectible Treasure #3 – Unique Loot #2:
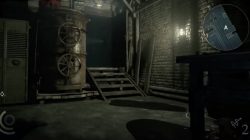
Continue walking from the previous collectible treasure, pass the mannequins either through duct on the right or straight through hallway. In the furnace room, go up the small ladder and into the next, darker room. Instead of going straight, drop down to the left, you will see small duct, go in there. Eventually, you will come by a room with mannequins and a lot of loot. Go to the end of the room and to the right side there is a safe. You will need a code to unlock it: 314.
Go through the door,
climb the stairs and jump to the left side
Safe is located in the back of the room, on the right side
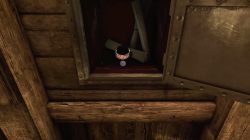
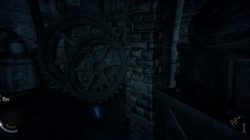
Collectible Treasure #4 – Serendi Stone Circle #2:
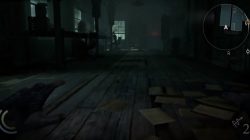
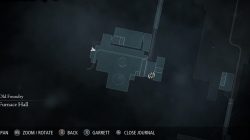
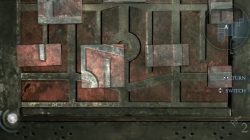
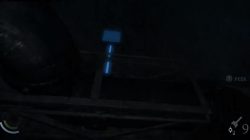
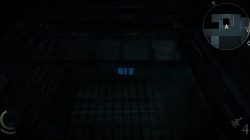
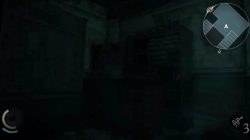
In the large room with automated furnace (“Furnace Hall”), go to the left hand side into the smaller and darker room. Walk until you see conveyor belt on your left, climb it and look inside of the small window. You will find Diamond Circle ring inside.
On this map, room is at the top, opposed to automated furnace
Look into the window at the top of this screen
Collectible Treasure #5 – Client Loot #2:
This is story based collectible treasure and it can’t be missed. Solve the puzzle by making the circle in the middle of the frame.
You will have to solve the puzzle on the board on the left side
Just rotate pieces to make circle in the middle
Chapter 3: Dirty Secrets
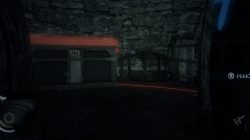
Collectible Treasure #1 – Pinned Castinets #1:
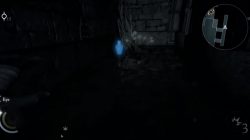
You will need wirecutters. At the very beginning of the chapter three, walk forward and to the left there will be locked door. Climb the platform on the right side and open the box (use foxus and follow blue line). Cut the cable with the wirecutters and you will open the door. When you are inside, climb the box and jump to the stone path. Collectible is on the floor.
Focus then follow blue line
Immediately after you climb the item will be on floor
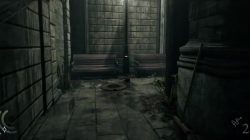
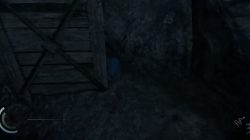
Collectible Treasure #2 – Serendi Stone Circles #3:
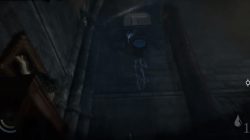
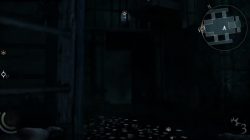
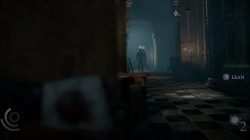
In the lower level of the Brothel, go to the stairs on the left hand side. When you pass second staircases there will be hooking point, climb there into the abandoned room. In the middle of the room there will be collectible treasure.
Climb here
There it is, sitting in the middle of the room
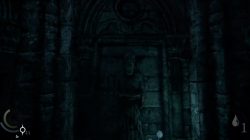
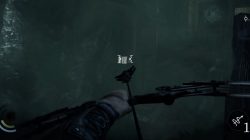
Collectible Treasure #3 – Unique Loot #3:
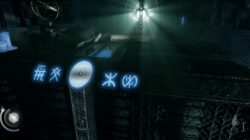
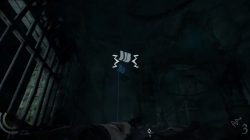
At the ancient ruins entrance level, stop before going through long hallway and turn right instead. There will be locked door for you to open. Go inside and use focus on cabinets both on the left and the right side. You will see four symbols. After that go straight to device which is located at the end and align those symbols like on the picture bellow.
At this point immediately turn right and unlock the door in front of you
Align the symbols like on the picture
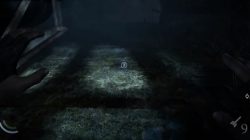
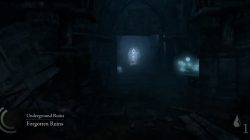
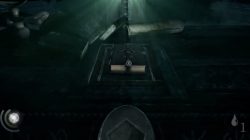
Collectible Treasure #4 – Memories of the Dead #2:
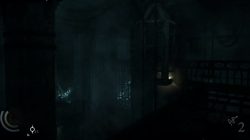
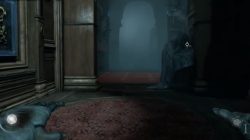
Still in Forgotten Ruins you will pass the waterfall on your right. Go through the door down in front and then turn right. Use focus to reveal set of books on your right side, inspect them to find switch for hidden doors. Collectible item will be right in front of you. Statue will hold it on the plate.
Focus, then inspect books marked blue in this pic
Statue will hold collectible item on the plate
Collectible Treasure #5 – Client Loot #3:
This one should be unmissable. Inside Library, you will again have to use focus and see four symbols, after that align them on the strange device and place it in the podium. It will then reveal the book which is the fifth Collectible Treasure, so pick it up.
Focus, then align these symbols
The podium-like structure will reveal collectible treasure
Chapter 4: A Friend in Need
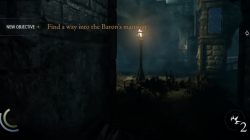
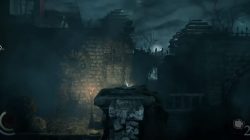
Collectible Treasure #1 – Serendi Stone Circles #4:
Immediately after Garret sees the building on fire ahead there will be spot for you too use rope arrow. Drop down, but don’t go through window ahead of you, instead slide down the rope to the ground. Go straight then turn left to see two benches next to the street lamp. You will find collectible treasure beneath the one on the right.
Use rope arrow here, and slide down
Look beneath bench on the right
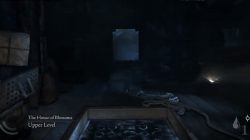
Collectible Treasure #2 – Unique Loot #4:
Later on, inside of Grand House, when looking up the stairs, go left. There will be door for some kind of office, go inside. Use focus and find button on the right side of the table, press it. It will open a secret wall, now in front of you (left side of the room), there will a safe for you to lock-pick. Inside is a second collectible.
Press this button
Collectible Treasure will be inside of this safe
Collectible Treasure #3 – Court of Montonessi #1:
While inside of Grand House, go up stairs and to the right hand side. Follow the mission marker and go to the dark room and turn left again. Go up the stairs to the third floor, there will be a guard. You can take him out to make things easier for you, but on the left side there is a painting on the wall which is actually a third collectible treasure in this chapter. Use your knife to cut it out and collect it.
Go straight to the dark room and then turn left
Make sure you have knife!
Collectible Treasure #4 – Memories of the Dead #3:
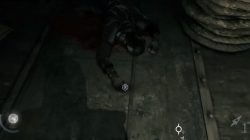
When you reach the Boiler Room of The Keep (with objective to find and rescue Basso), continue going forward. You will see a guy that is dying and in his hand he will hold collectible treasure.
Continue going forward until you see someone on the floor
Take the collectible out of his hand
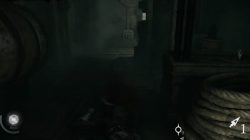
Collectible Treasure #5 – City Heritage Plaques #1:
Looking straight from the body there will be a fifth collectible treasure. Go forward and on the wall there will be a plaque. You will need a wrench to take it.
Continue going forward from the dead body
For this collectible you will need the wrench
Collectible Treasure #6 – Mortal Coils:
When you are in Safe Housing level in the scene where all guards are looking for you, go to the top floor. You might need to take out some of the guards, but it isn’t necessary. There will be a dark alcove and inside, sitting on a large crate there will be last collectible in this chapter.
Go forward until…
…Here, then go right and look at wooden crate
Chapter 5: The Forsaken
Collectible Treasure #1 – City Heritage Plaques #2:
Right at the beginning of the chapter and before Asylum, go left and continue going until you reach wall. There will be Plaque that can be collected using the wrench.
Go left here
Again, you will need the wrench
Collectible Treasure #2 – Court of Montonessi #2:
Once you go inside of the Asylum, go to men’s ward which is on the right side. Going through the hallway, turn right and lock-pick the first door. Go inside and check out the peep hole on the left, you will see the painting and after that you can go to it and cut it out.
When you are here, go to the hallway on the right side
You have to check out this peep hole to get collectible
Collectible Treasure #3 – Flowers eternal #2:
On the left hand side of the Asylm, you will be in women’s ward, go through revolving door. Look to the left and check out open elevator shaft. Take out rope arrow and shoot, then slide down. There will bi small hole through which you can go, once down look left at the crates and climb them to find third collectible in this chapter.
Use rope arrow here
Go to the left and climb crates
Collectible Treasure #4 – Serendi Stone Circles #5:
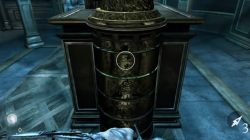
On the third floor, after you see one person beating other, turn right into small, but well lit room. Check the safe on the wall and open it using the code 731.
The room is first on the right
Safe is on the left wall
Collectible Treasure #5 – Unique Loot 5:
Downstairs in the Asylum, move right and go through the reformation room. Drop down in the part of the room with hanging cages. Use rope arrow on the available hot spot on the ceiling, and then jump from the first rope to the second. Now, move to the right and in the bird cage there will be a collectible treasure.
You will have to jump from rope to rope
Collectible treasure is in this cage
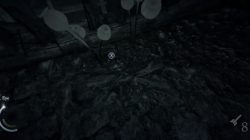
Collectible Treasure #6 – Memories of the Dead #4:
From here, jump back on the nearest rope and drop down. Enter a long hallway on the right side of this room and at the end there will be a vase. You will need to use focus to spot it, but after you do, smash it to find last item in this chapter.
Go straight ahead
Smash this vase
Chapter 6: A Man Apart
Collectible Treasure #1 – The Pinned Castinets #2:
Right at the start of the sixth chapter, turn left and go towards waterfall. Last pillar in the row will be climbable so go up. After that jump across to next one, there will be a bird’s nest and inside there is a collectible treasure.
Move forward until you reach last pillar then climb it
Jump across
Collectible Treasure #2 – City Heritage Plaques #3:
From previous collectible go to the next section (follow the mission marker), once you pass the gate stick to the left side. Walk until you see a huge statue that also poses as fountain. Climb the steps, and at the base of statue there will be a plaque for which you will need a wrench.
Turn right here and stick to the left side
Collectible is at the base of the statue
Collectible Treasure #3 – Serendi Stone Circles #6:
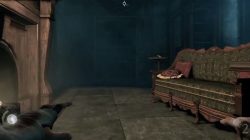
When in Northcrest Manor, on the first floor, go into the room on the right with a fireplace and a chess game. In the back, on the right side, there is a safe that you can open by using 889 code.
Go the second room on the right
Safe is on the right wall in the back
Collectible Treasure #4 – Unique Loot #6:
When you reach second floor of the Manor (and there are two ways to do that, using the stairs or the other route with traps) in the hallway there will be painting that has switches. Pressing them will open secret door. In the middle of the secret room you will have to align lion-shaped cylinders. For the one on the left just look for the red markings. The one on the right will be a bit harder, so check our pic to see the solution.
Check out the painting on the left
Align the cylinders like this
Collectible Treasure #5 – Court of Montonessi #3:
Check the destroyed section of the first floor of the manor. When you go from big room and into the dark hallway, the painting will be on the wall.
Slip by these guards or take ’em out and go through door on the left
Collectible painting is on the right of this pic
Collectible Treasure #6 – Memories of the Dead #5:
Inside of The Laboratory, when you see strange org, climb the stairs that go around it until you reach place where you can use your rope arrow. Hop on the rope and drop down until you see a platform to jump onto. Use focus, since the collectible treasure is really small and you might miss it.
Follow the stairs on the right hand side of the Orb and you will reach a sport to use rope arrow
Collectible treasure is actually a very small ring, here on the right side
Chapter 7: A Hidden City
Collectible Treasure #1 – Unique Loot #7:
Climbing down in The Loading Docks Exterior level, drop down until you see a wooden platform with the wheel, which lowers the bridge in front of you. Move quickly across lowered bridge and turn left. Continue walking and go inside that mine shaft, look left and you will see a collectible item hidden bellow collapsed wall.
Use the wheel to lower the bridge
Carefully hidden
Collectible Treasure #2 – Mortal Coils #3:
Second collectible of this chapter is located in the Catacomb Passages. After going downstairs and into the larger room, turn left. You will see the spot to use rope arrow. Jump across and as soon as you land there will be a door for you to lock-pick. Inside of the room there will be a chest, but it has a trap, so look to the right. There will be a box, where you can use your wire-cutters and after that you are free to open the chest and collect the treasure.
You will have to use rope arrow to jump across
Disable the security system before opening this chest
Collectible Treasure #3 – Memories of the Dead #6:
When you reach Graven Lair, further in the chapter, pay attention to hanging wooden crate above you (look at the screenshots). Shoot it down with the blunt arrow, then run towards it and jump on it. Then jump to the balcony on the right. When you do, right there will be a really small ring next to the flowers and the fence. Use focus and screenshots to see it, since it’s really well hidden.
Shoot down this crate
Collectible treasure is really well hidden
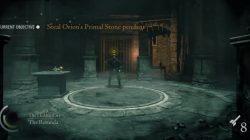
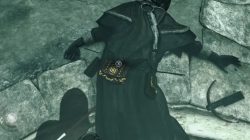
Collectible Treasure #4 – Serendi Stone Circles #7:
During the boss battle, you can either kill or stun your enemy and pick-pocket him for the last collectible in this chapter.
Collectible treasure is in this scene
Pick-pocket this guy
Chapter 8: A Dawn’s Light
Collectible Treasure #1 – Pinned Castinets #3:
When you are inside of the mine tunnels, sneak past the first creature and continue walking down the right. Follow rails and go down, you will see another creature crouching down. Either wait for him to leave or kill it with blast arrow. There will be a treasure chest on the right side from where he was.
Sneak pass it and go to the right side
Creature burning on the left, treasure chest on the right
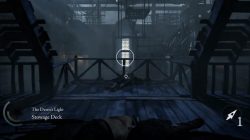
Collectible Treasure #1 – Court of Montonessi #4:
When you reach the Stowage Deck, sneak or avoid the guard in front of you, either way continue to the right side until you come to the door. Open it and there will be another guard in the room. Same applies to him as well, but you will need to come to the work bench where he was, as to the left side there will be last collectible treasure in the campaign mode – a painting. Cut it out.
Go right from here
That painting is the last collectible treasure in the chapter
The guide would be great if you named the collectibles. Instead of saying Serendi Stone Circle #1 it would be great if you said Amethyst Circle or whatever stone it is. I have no idea if I got this already. It’s a great guide but I am just making a slight suggestion.
I would like to point out that at no time do you have to use focus, even with the medallion. Just looking at the birdscratches is enough for Garett to know which to use.
This is the best website without dis I would be in da dark thanks for taking the time to do it, also on the second chapter ” Path of the Dead ” the key to the machinery room is also in a chest by the sleeping guard beside the locked door. ( watch out for glass and take your time… he’s not going anywhere )


The guide would be great if you named the collectibles. Instead of saying Serendi Stone Circle #1 it would be great if you said Amethyst Circle or whatever stone it is. I have no idea if I got this already. It’s a great guide but I am just making a slight suggestion.
I would like to point out that at no time do you have to use focus, even with the medallion. Just looking at the birdscratches is enough for Garett to know which to use.
Excellent guide so far, saved me a bunch of trouble.
Unnecessary correction: It’s “Mortal Coils”, not “Moral Coils”.
Typo 🙁
Thank you for pointing that out
This is the best website without dis I would be in da dark thanks for taking the time to do it, also on the second chapter ” Path of the Dead ” the key to the machinery room is also in a chest by the sleeping guard beside the locked door. ( watch out for glass and take your time… he’s not going anywhere )