Uncharted The Lost Legacy Hoysala Token Locations - Yas Queen Trophy
Uncharted: The Lost Legacy Hoysala tokens are collectibles in chapter 4. Collecting them all will unlock the Yas Queen trophy and give you the Queen’s Ruby item. This bracelet helps you find other collectibles more easily. In this guide, we’re going to show you where to find all eleven Hoysala Tokens in Western Ghats.
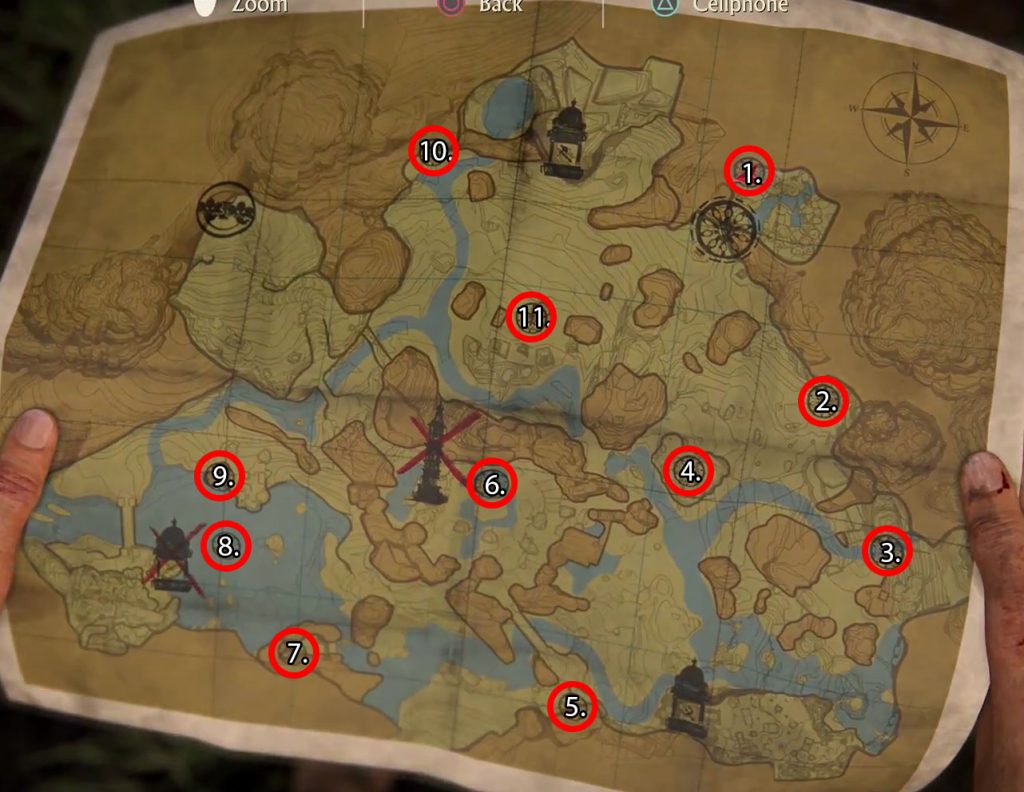
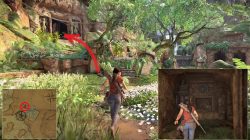
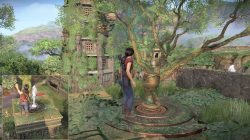
You should get one particular token first, because it’ll mark the locations of all other Hoysala tokens on the map, making it a lot easier to grab them. Go to the northeastern part of the map. Once you visit the tower at the center of the Western Ghats, it will be marked with a question mark. There’s a single, small entrance that leads to the enclosed zone with a pool at its center.
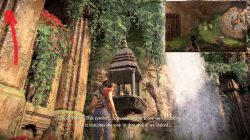
Once you reach this “Monkey Island”, keep to your left and go into the only accessible building. Go to the far end and interact with the pedestal. If you look up from here, you’ll see an acnient map on the wall. When you interact with the pedestal, Chloe will copy the locations of the tokens onto her own map.
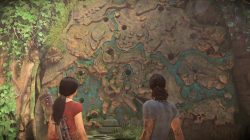
As soon as you interact with the pedestal, a nearby door will open and you’ll get access to the Hoysala token with an owl on it. If you place it on the pedestal, you’ll unlock the Token for Granted trophy.
Where to find Hoysala Tokens
- Owl Token – The first one, described above. Found in the northeastern part of the map, where the monkeys reside.
- Snake Token – Head to the eastern part of the Western Ghats. Go north from the river and follow the mountain to your right. The structure you need to find has many golden bells in front of it, and parts of it are embedded in the mountain. Climb on it and you’ll find a closed gate with seven poles. You’ll need to shoot seven bells in order to unlock it.
- Boar Token – Follow the southern river bank in the eastern part of the map. It will take you to the small tower. You can swing on a rope to the other side of a slippery hill from it. There is a small cave on the other side that leads to the collectible.

2. Shoot the bells. 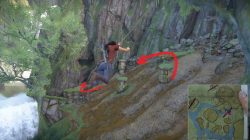
3. Down the slippery slope. - Elephant Token – Found in the eastern part of the map, on top of a small hill, north from the spot where the river forks. You’ll find a lidded shaft here, with a rope on it. Climb on the wooden plank above it, attach the rope and swing to the other side of the plank, in order to pull up the lid with your weight (not saying Chloe is fat at all). Jump in the hole and recover the Hoysala item.
- Peacock Token – In the south – follow the bridge that connects the central area with this side of the map. There are a lot of hostiles in this area. They have a mounted machine gun there, so be careful. Just next to this weapon, you can spot a crack in the grey brick wall. You’ll have to destroy it with explosives to loot the token.
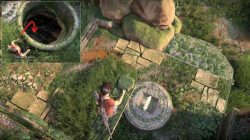
4. Remove the lid, go down the hole. 
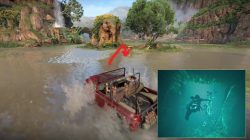
5. Defeat the enemies, blow up the entrance. - Cow Token – East from the central tower, there are ruins with many buildings scattered around a central one. On this central building, you can find a golden fish statue. Interact with it to power the water mechanism. As soon as it starts running, look around and you’ll spot water spouting from several locations near you. You’ll need to step on pressure plates next to the holes in order to redirect the flow toward the central cup. Once it is done, the central cup will reveal the cow token.
- Hawk Token – This one is found in the southeastern area. There is a small island there, with a narrow valley surrounded with tall mountains. Find a hawk statue there and start climbing the mountain. There is a path just next to the statue that will take you up to the wooden plank. You’ll just need to perform a series of rope swings in order to reach the other end, and the plateau with yet another walled entrance. Destroy the wall with explosives and get the token.
6. Press the switch, step on the pressure plates, easy. 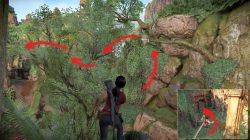
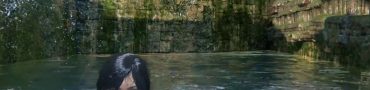
7. Need to swing more than a couple of times to reach the destination. - Duck Token – Almost at the center of the lake in the southeastern area, you’ll find a statue of an elephant. Just in front of it, there is an almost invisible room underground. It is filled with water. You’ll need to find it, and swim through to the other side, where the token is.
- Lion Token – North from the previous one, there is a tall boulder with some ancient ruins on top of it. The enemies have already dug out the token, you just need to find the lockbox and steal it.
8. Find an underwater entrance just in front of the elephant statue. 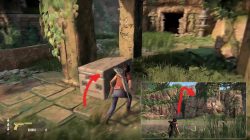
9. Inside the lockbox. - Horse Token – There is a tall waterfall in the northwestern area. Look to the left when you’re at its bottom, and you’ll see a small horse statue there. Climb to the second floor nearby, and head into the room. Rotate the dials on the wall to assemble the picture of a horse. It will open the nearby gate and you’ll be able to loot the horse token.
- Tiger Token – North from the central tower, at the center of the lower part of the large platform. There is a small tiger statue close to the grey, walled entrance. You’ll have to destroy it with any sort of explosive to get in, and get the token. Much rude, so wrong.
10. Close to the waterfall, on the second floor. 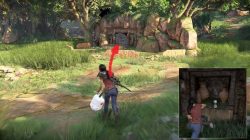
11. Probably the easiest one.
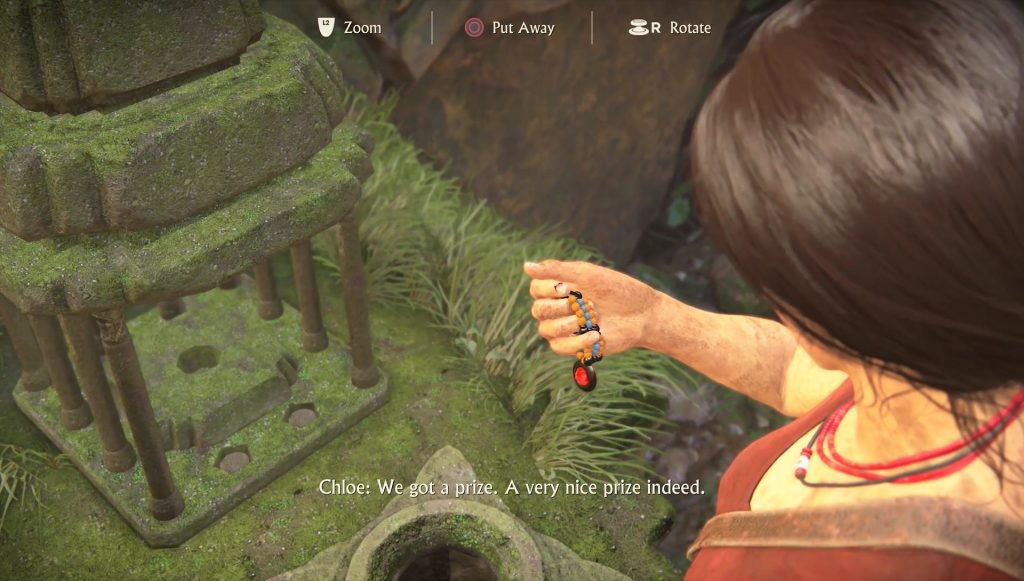
Queen’s Ruby and Yas Queen Trophy
When you have all 11 tokens, head back to the monkey island, where you had picked up the first one. Interact with the pedestal in front of the giant wall map and wait for a moment. The cage with the Queen’s Ruby will open up and Chloe will put it on her arm. This item will glow red when you’re near a collectible. It will also vibrate your controller, an option you can turn off in the pause menu. The Yas Queen trophy is unlocked shortly after.