Zelda BotW Mirro Shaz Shrine - Tempered Power Challenge
Mirro Shaz is not an easy Zelda Breath of the Wild Shrine for temperamental people. Although Mirro Shaz only has two challenges to overcome, due to the fact that weapons are breakable, you won’t like failing here. Luckily for us, there are some weapons inside that you might use as disposable. In this guide, we’ll show you how to complete Zelda BoTW Mirro Shaz shrine and its Tempered Power challenge without losing your cool.
Mirro Shaz Shrine Location & Walkthrough
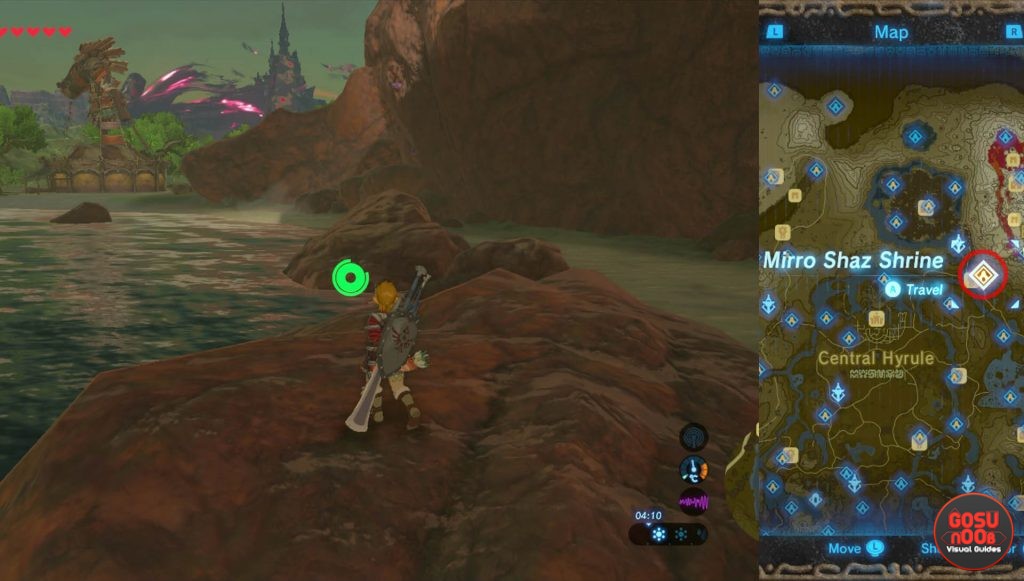
If you head to Korok Forest in northern Hyrule by following the road from Central Hyrule, you’ll reach the Woodland Tower. South of this tower, just east from the Woodland stable, follow the Pico Pond shore to the east. It will take you to the entrance of Mirro Shaz. No need for mountain-climbing or anything else.
Zelda BoTW shrine locations map – find & complete all 120
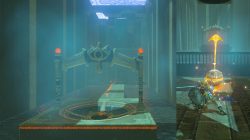
Once inside the shrine, go down the elevator and loot the treasure chest in the first room to acquire an Iron Sledgehammer (12 damage). Use it, or any other weapon, after you Stasis the nearby ball to get it across the room and onto the switch hole. The arrow has to turn to darker orange in order for the ball to reach its destination. If you miss the shot, just hit the nearby crystal to place a new ball into the starting position.
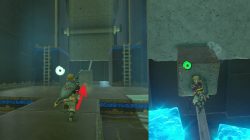
With the previous step done, the nearby wall raises up and reveals the next area. To make it to the final Spirit Orb room, you’ll need to lower down the seesaw. You can Stasis the small cube and hit it. It will lower down the seesaw. There is also a harder way: just step on the rail and push the small cube to the other side.
Mirro Shaz Giant Ancient Core
If you want the Giant Ancient Core, do not go for the Spirit Orb right away. Just next to it, there is a hidden passage to the lower level.
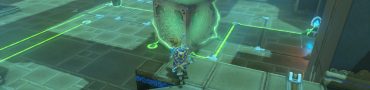
In this challenge room, you’ll need to repeat the actions from the start. There is also another chest with the same weapon from the start. This time, you need to hit the ball stronger than the first time. Pick up the ball and place it a bit behind its original spot. Use Stasis and hit the ball with any two-handed weapon until the arrow turns red. This phase is all about getting the right power and angle.

Once the ball is inside the switch hole, the nearby gate opens and reveals the final treasure chest with the Giant Ancient Core.