Division 2 Operation Dark Hours Raid Guide
Operation Dark Hours is the first raid in The Division 2. It’s an eight-person activity meant for the players with the highest level and gear score. It’s going to challenge you with a bunch of enemies, tough bosses and difficult puzzles. The rewards are going to be commensurat – one exotic weapon, new gear sets and a bunch of cosmetic items. If you’re having issues with any part of it, our Division 2 Operation Dark Hours raid guide will help you defeat bosses Max “Boomer” Bailey, Ben Dizzy Carter, Carl Ricochet Dawson, Oliver Weasel Gordon, Buddy & Lucy.
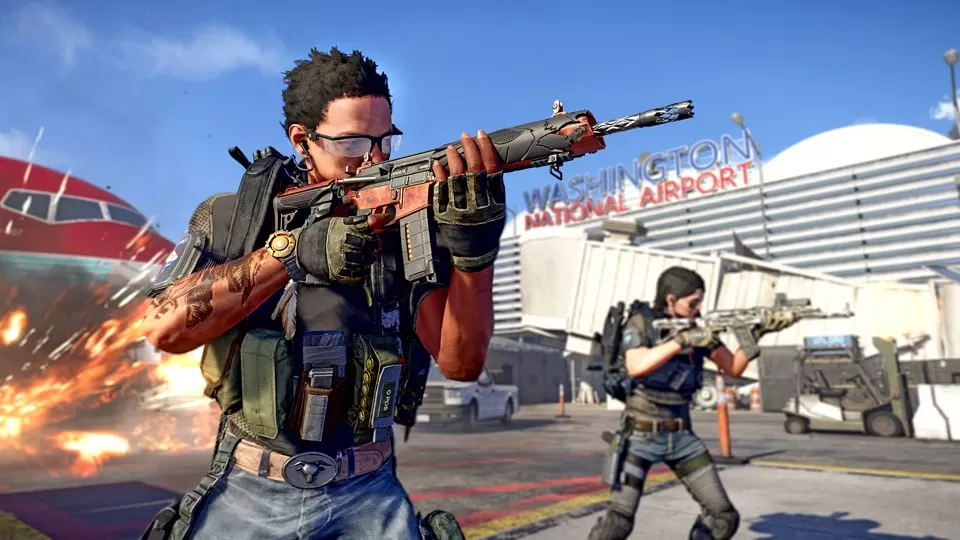
Assault the airport
As the raid starts, you’ll use a series of tunnels to get to the airport. Watch out for the dogs when you reach the tarmac, and use mics to warn your teammates of them. After you’ve pushed the enemies back far enough, a helicopter will bring reinforcements behind you.
After you’ve cleared the area, the doors will open and allow you into the terminal.
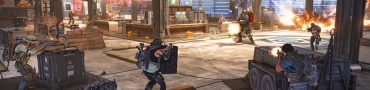
Destroy signal source
Once you’re at the terminal, you’ll have to destroy signal sources. They’re the blue boxes scattered around the room, which provide enemies with immunity when they’re near. Use the turrets to disable them.
How to defeat Max “Boomer” Bailey boss
The boss is immune to damage at first. At least one player will have to act as bait. Whoever spots a red eye icon in the middle of the screen – this means the boss will go after them. They should use the furniture in the middle of the room as distractions to slow him down. While they’re kiting him, others should deal with adds and mount the turrets. When you see a red box on the boss’ back, shoot it in order to stun him. When he drops to his knees, focus damage on him.
The turrets jam easily, so you have to drag the boss around the room. Also, he has a healing plate on his chest. Whoever is baiting him should shoot at it whenever it starts glowing. This will stop him from healing. Keep the adds and the boss away from the turrets – they’ll try to destroy them. Also make sure you destroy the signal sources whenever they start glowing again, since they provide immunity to the enemies.
You can also disable the source signals by using the laptops in the middle of the room. When the voice announces the defense systems are going back online, four people need to interact with them at the same time.
Max “Boomer” Bailey boss loot
Negotiators Dilemma Nibble Backpack Blueprint
Wyvern Wear Didactyl Pad Holster (gear score 500)
Military M60 E4 (gear score 500)
SRS A1 (gear score 500)
Gear Mod – Utility Protocol: Intensity (gear score 500)
586 Magnum (gear score 500)
Division 2 Dark Hours Raid Loot
Investigate the plane
Divide into two and go on both sides of the plane. You’ll see a set of three screens on each. On one side, all three will be gray. On the other, one will be green. The team with the green screen should call out which position it’s in. Both teams have to interact with the screen on that position on their side at the same time. This will start the boss fight.
How to beat Ben “Dizzy” Carter & Carl “Ricochet” Dawson
Each boss will land on one side of the plane. Stay divided in two and deal with each separately. Stay in cover, and stay spread – they have a lot of grenade attacks. The panels will light up from time to time, when the gas becomes purple, and you’ll have to interact with them again. You do less damage while the gas is purple, so it’s in your interest to make it orange again as soon as possible. Make sure at least one player on each team keeps their eyes on the screens. This will slowly raise the plane up, letting you join each other. You should coordinate and whittle the bosses’ health bars in tandem, so that they die at more or less the same time. When one dies, it will spawn another, harder boss.
How to defeat Oliver “Weasel” Gordon?
The main thing here is to wait for the gas to turn orange before you start shooting at him. You don’t have to do anything – simply survive the purple part, and do damage when the gas is orange. Keep on top of the adds as well, and don’t let them overwhelm you. That’s all there is to it. Hide when the gas is purple, shoot when it’s orange.
How to defeat Lucy & Buddy
In this fight, you’ll have to defeat two robots in about 6 minutes – the screen in the middle of the arena keeps track of time. The catch is that you’ll have to damage them evenly, because whenever one has significantly more health than the other, the one with lower health will get a massive boost.
You have to keep both their health bars within the white block. Keep calling out the one with more health, so everyone can focus on them. Also keep your eyes and ears peeled for the massive overcharge announcement – when it happens, run to the two laptops and interact with them to cancel it. If you don’t, it’s almost a guaranteed wipe.
Whoever has the focus should pull the robots away from the middle of the room, and away from the laptops. Keep them separate and allow others to access the laptops when they have to. As for the attacks, be wary of the 360 spray – it happens after they crouch.
How to destroy DDP-52 Razorback
In this phase, there are four numbered control points with generators. When you power them all to 100%, the truck in the middle will release a bunch of drones into the air. There are also four missile launchers with corresponding numbers – from time to time, an elite enemy will appear and approach one, trying to launch a missile strike. At least one player needs to keep an eye on these and take them out before they can launch.
Power up the generators as soon as possible, and stay next to them. The truck will open up, along with two weak spots in the front and back. Shoot them. Once they’re destroyed, chuck a couple of grenades into the two holes they reveal. This will make a giant panel rise up from the truck. You can leave the circles at this point.
You’ll see two weak spots on the back of the giant panel. Part of the team should shoot them while the others deal with the attacking drones. Once you destroy those two, another one will appear above them. Shooting that one will reduce the boss’ health.
The panel will retract after a while, and you’ll have to repeat the whole process. Take a breather before you start the process again. Doing this four times will whittle the boss’ health down to nothing, but there’s still one thing you’ll need to do. Everyone will have to rush to the missile launchers and destroy the panels on the back sides in numeric order (1,2,3,4).
How to earn additional Commendations
Players can earn additional Commendations by taking down each boss while meeting a particular condition:
- The Rapid Response Merit: awarded for killing Boomer with no player using the same mounted weapon twice.
- The Target Prioritization Merit: awarded when a group kills Weasel while at least one of his two sidekicks is still alive.
- The Evasive Maneuvers Merit: awarded when a group kills the Twin Dogs and all players avoid being hit by a seeker mine.
- The Blitzkrieg Merit: awarded for killing Razorback in four openings or less.
Seems like a very solid boss guide (I say “seems” because I have not done the raid yet).
I get tired of YouTube guides. I am old school and prefer reading. Thank you very much for taking the time to write this up!
Grim