Home » Bloodborne » Shadows of Yharnam boss guide | Bloodborne
Shadows of Yharnam are a boss fight in Bloodborn. They can be found in the Forbidden Woods zone.
▼Article Continues Below▼
This is a very tough fight and you have to have your hunter fully prepared. Have a full stock of Blood vials and Quicksilver bullets and have your weapon fully fortified and upgraded with gems (it should be +6 fortified at this point with some lvl 7 blood gems). I would recommend at least a level 40 hunter to attempt this with 45-50 being the recommended range for an easier fight. For many this will be the sixth boss fight in Bloodborne.
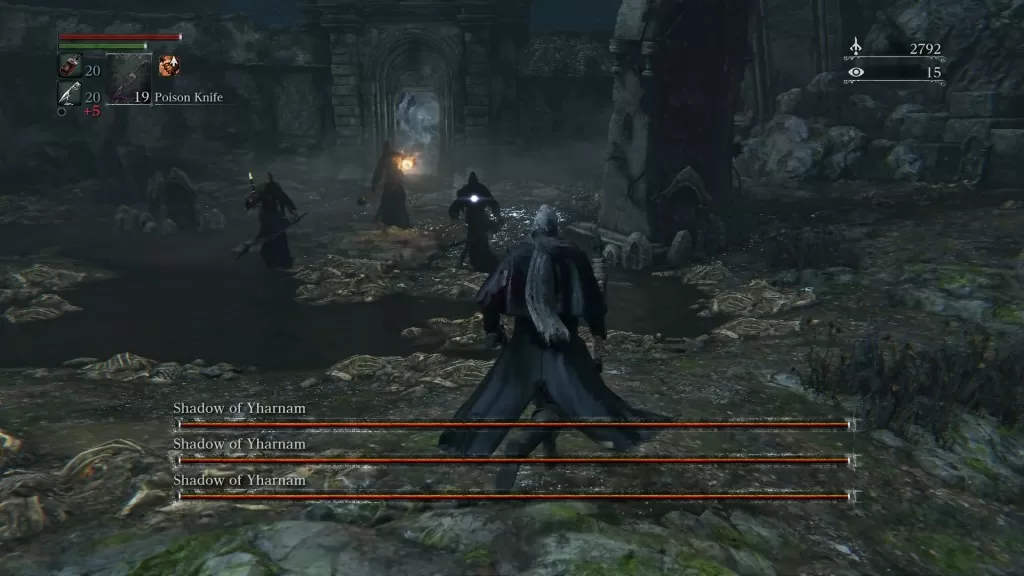
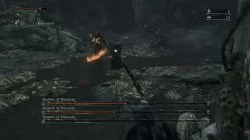
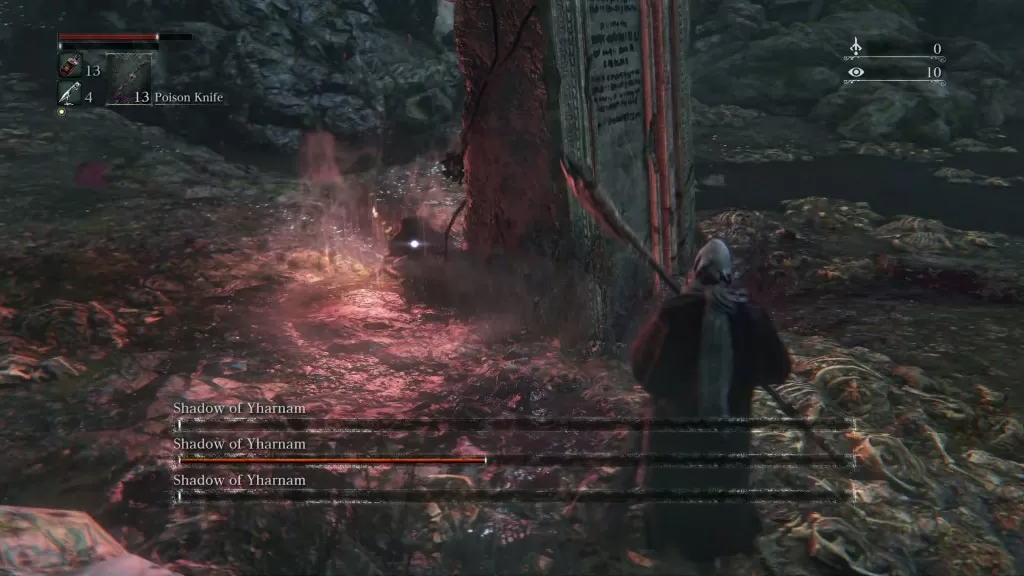
There’s a lot of room for mistakes to be made and as the fight progresses each misstep will be punished severely. There are three shadows you will be fighting and three phases of the fight. Shadows go into phase two after you’ve brought any of the shadows bellow ~40%. Phase three begins when there is only one shadow left. Based on your play style and what type of enemy you find easier to handle you should pick which shadow to kill first and which to leave for last. Three shadows are: Melee Shadow (sword carrying mob), Mid range shadow (one with the candle) and Long range Shadow (fireball shooting one).
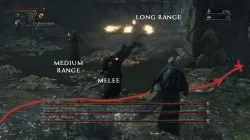
Melee
Mid Range
Long Range
First Phase
Gets in your face, but has low range. You can stagger it for visceral attacks.
Slices with his katana when close or does a flamethrower mid range attack
Shoots three fireballs you have to dodge away from
Second Phase
Becomes more aggressive and its sword range is longer. Has a medium range, extended sword, attack.
Has a fire sword and becomes more aggressive.
Starts shooting catapult style fireballs, three at a time, with slight AOE damage alongside his regular fireballs.
Third Phase
Unknown
Has a red circle appear around him and that summons a huge snake that can one shot kill you if you do not dodge its huge range attacks
Unknown
Shadow of Yharnam video guide
How to beat Shadow of Yharnam boss?
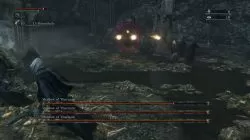
Fight is setup so that melee shadow is always trying to get in your face and that almost always prevents you from getting close to the mid range shadow. This leaves the option of attacking the melee guy (he can be stunned with a well timed QS shot and then damaged with visceral attack), or if you make a run for it you can separate the long range guy from the pack, run back to him and do a few short attacks before you have to make another circle.
Phase 1
The first phase should be you dodging fireballs and melee attacks while trying to remove at least 50% of each shadow’s health. This takes a bit of practice and I usually had the following movement scheme in phase one. As soon as I enter the arena I run right, behind the big stone, and do two dodges to avoid melee shadow’s jump attack. This should put the stone between you and the fireball guy and you can do some damage to the melee shadow now. Stun it and visceral attack it. This will break your lock on the target and I use this time to run away all the way to the other side of the arena. From there I lock onto the fireball guy and charge him while dodging his fireballs. Melee guys will be trying to catch up and you should have time to do at least a few attacks on the fireball guy. Go back behind the big stone and attack the melee guy again. It would be perfect if you can damage the mid ranged guy (the one with the candle) if you get a chance. Do this until you have all three guys at about 50% health. You can get melee guy to 40%, but long range guy will move the whole group to phase 2 if you get him bellow 50%, so be careful there. When you are ready, attack the long range guy until his health drops bellow 45% to push the fight into phase 2.
I usually run towards the big tombstone to shield away from fireballs and take on melee and mid range shadows first. Remember to dodge away.
Once you have to run away go to the opposite side of the arena and run back to the ranged shadow who should be singled out now.
Phase 2
They will start to transform and you should take this single opportunity to do R2 charged attack on the shadow you want to kill first. I usually killed the fireball shadow, because he annoyed me the most and dies the easiest. Unleash all you have on him and he should be dead by the time everyone transforms. Dodge your little heart out now because the two shadows left will slice and dice at you and if they are far away they do these extended sword attacks that have a very long reach. You need to close the distance to melee guy, while mid ranged guy is a bit away from you two. Once close bait the melee guy into close range attack and interrupt it with a well placed gun shot. Follow the stagger up with a visceral attack and run away. Do this several times and melee boss should be dead. This will trigger the third phase.
To push the fight into 2nd phase bring down the fire mage (R2 charged attacks while he transforms).
Melee shadow has extendable sword now and Candle guy has a fire sword.
Phase 3
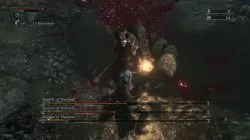
During the final transformation you better do the most damage you can to the only standing shadow. You want to kill that guy ASAP. If not, he will start summoning huge snakes that have very big range and hit very hard. You will see he is summoning because of a red circle appearing around him. You can do some serious damage while he is summoning but don’t be greedy because the snake will start hitting as soon as it spawns and you need to be as far away as possible. Snake will despawn eventually and if you were lucky enough and dodged everything you can you should be able to attack the mid ranged shadow once again. With luck you will have defeated it and survived one of the tougher boss fights in the game. Good job hunter.
In the third phase the last shadow becomes very powerful. If left with mid ranged guy, he will start summoning giant snakes (as seen in the image above)
Rewards
2x Insight
Blood Rapture Caryll rune (V.ATKs restore HP +200)