Depresso Crianza Lista, Ubicación, Objetos Obtenibles y Aptitud de Trabajo en Palworld

Depresso es un Oscuridad Pal en Palworld. Este Pal de mirada torva apenas tiene amigos, pero es muy bueno. Se los ha visto compartir su comida con otros Vixy que se habían apartado de la manada.

▼Article Continues Below ▼
Palworld Depresso
Depresso captura de pantalla por Gosunoob.com ©
Depresso Palworld Paldeck Pal Icon
Palpedia n.º#017
AtributoPal Element Oscuridad Icon
Aptitud de trabajo
  • Trabajo manual Nv. 1
  • Minería Nv. 1
  • Transporte Nv. 1
Técnica
de
compañero
Inoculación de cafeína
Al invocarlo, Depresso se tomará una ingente cantidad de bebida energética y, durante un tiempo determinado, su velocidad de movimiento aumentará mucho.
Parámetros
PV70
Ataque70
Defensa70
Cantidad de comida2/10
Nocturno

Objetos obtenibles

Depresso tiene 1 objeto. Estos suelen ser materiales de fabricación. Algunos Pals también sueltan objetos de mejora o incluso armas.

  • 2-3x Glándula venenosa 100%

Depresso Ubicación – ¿Dónde encontrar y capturar Depresso en Palworld?

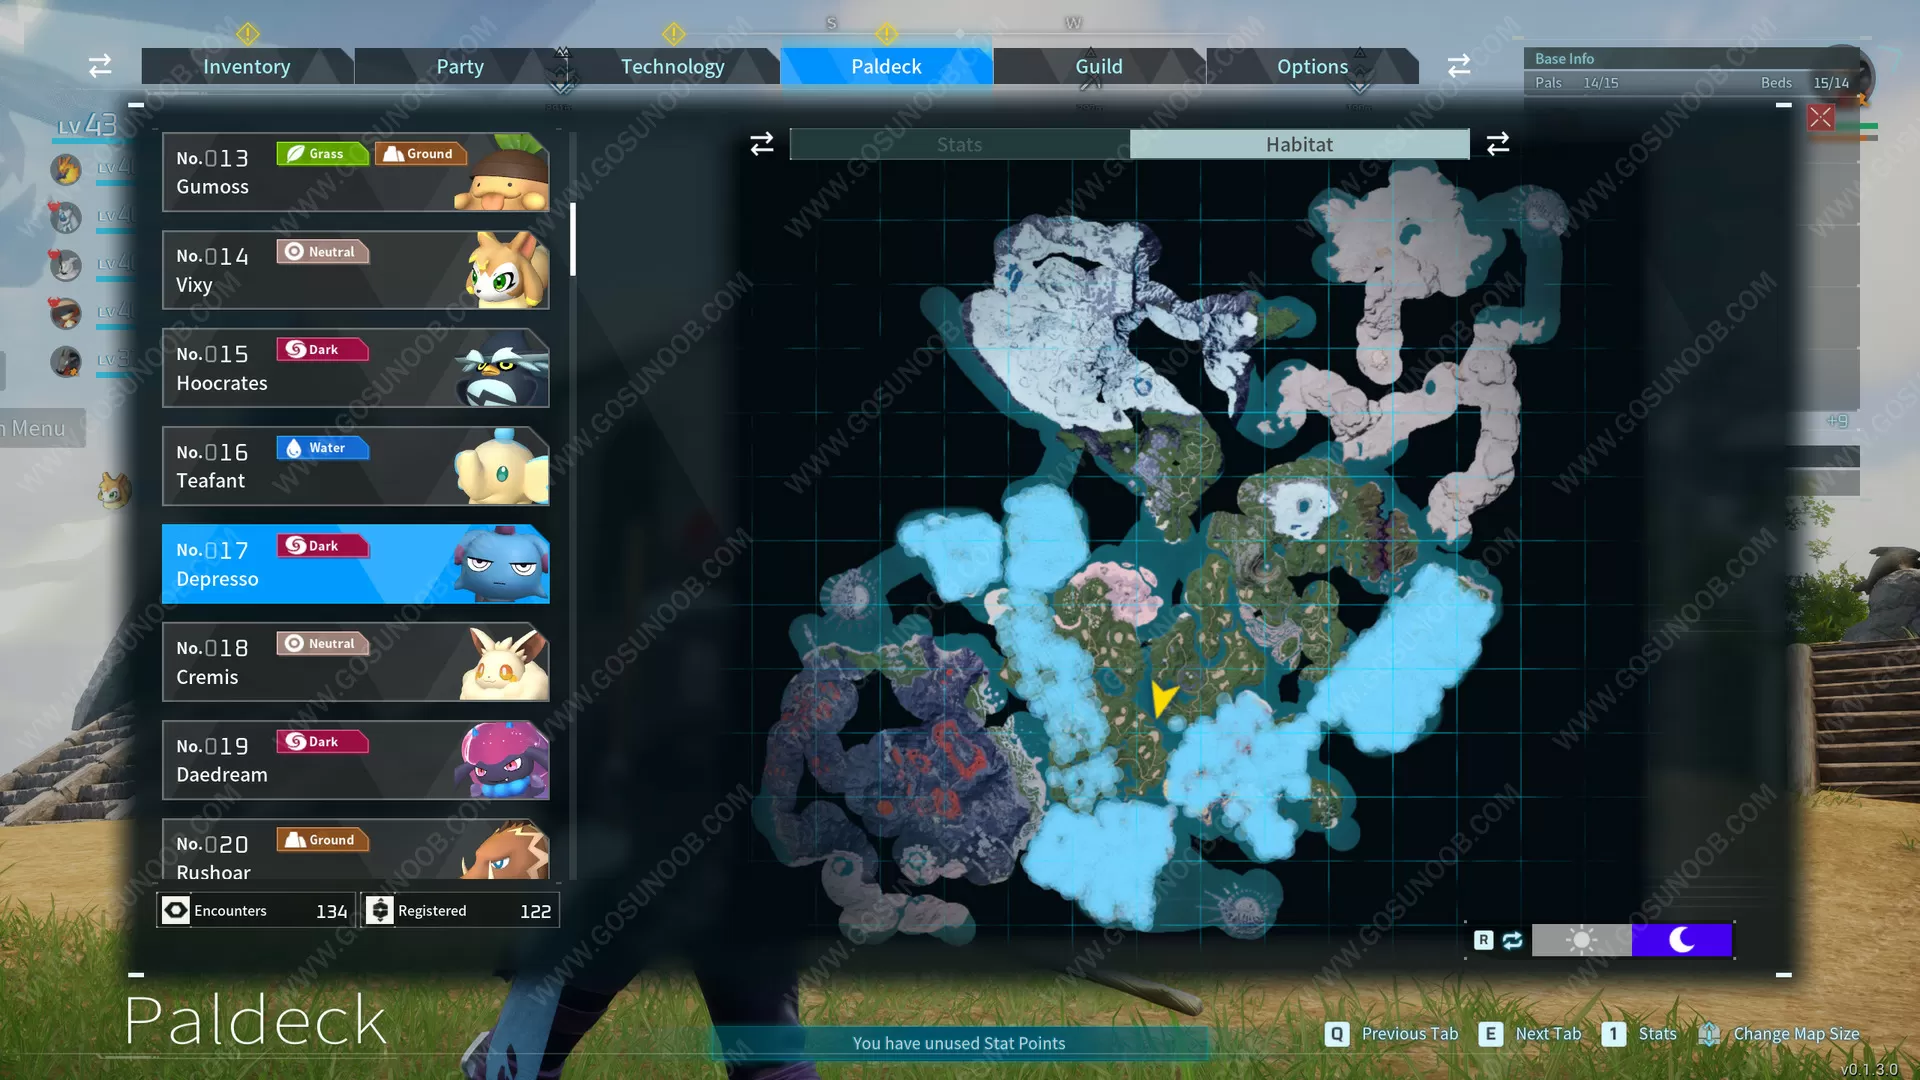
Algunos Pals solo se pueden encontrar durante la noche. Otros solo están disponibles como jefes. Algunos Pals raros se vuelven disponibles en Santuarios de Vida Silvestre después de derrotarlos como jefes. La captura de pantalla del mapa a continuación muestra puntos naranjas para Pals diurnos, puntos azules para Pals nocturnos y ubicaciones en el mapa para jefes.

Ubicación del Mapa de Depresso en Palworld
Captura de pantalla capturada por Gosunoob.com ©

¿Cómo obtener Depresso mediante la cría?

Hay 29 formas de criar Depresso. A continuación se muestran las primeras 10 de ellas. Necesitas que los padres sean de diferentes géneros y sean los Pals especificados.

Padre 1Padre 2
Lamball Icon#1 LamballKillamari Icon#23 Killamari
Lamball Icon#1 LamballSwee Icon#53 Swee
Cattiva Icon#2 CattivaRibbuny Icon#39 Ribbuny
Cattiva Icon#2 CattivaSwee Icon#53 Swee
Chikipi Icon#3 ChikipiKelpsea Icon#81 Kelpsea
Chikipi Icon#3 ChikipiKelpsea Ignis Icon#81B Kelpsea Ignis
Lifmunk Icon#4 LifmunkFuack Icon#6 Fuack
Lifmunk Icon#4 LifmunkTocotoco Icon#27 Tocotoco
Foxparks Icon#5 FoxparksJolthog Icon#12 Jolthog
Foxparks Icon#5 FoxparksJolthog Cryst Icon#12B Jolthog Cryst
Haz clic aquí para mostrar las combinaciones de cría restantes 18
Fuack Icon#6 FuackMau Cryst Icon#24B Mau Cryst
Fuack Icon#6 FuackHangyu Cryst Icon#32B Hangyu Cryst
Sparkit Icon#7 SparkitPengullet Icon#10 Pengullet
Sparkit Icon#7 SparkitJolthog Cryst Icon#12B Jolthog Cryst
Pengullet Icon#10 PengulletHangyu Icon#32 Hangyu
Pengullet Icon#10 PengulletFlambelle Icon#70 Flambelle
Jolthog Icon#12 JolthogHoocrates Icon#15 Hoocrates
Jolthog Cryst Icon#12B Jolthog CrystFlambelle Icon#70 Flambelle
Vixy Icon#14 VixyBristla Icon#30 Bristla
Vixy Icon#14 VixyRibbuny Icon#39 Ribbuny
Teafant Icon#16 TeafantFlopie Icon#28 Flopie
Teafant Icon#16 TeafantKelpsea Ignis Icon#81B Kelpsea Ignis
Cremis Icon#18 CremisRibbuny Icon#39 Ribbuny
Cremis Icon#18 CremisSwee Icon#53 Swee
Killamari Icon#23 KillamariMau Icon#24 Mau
Mau Icon#24 MauFlopie Icon#28 Flopie
Mau Cryst Icon#24B Mau CrystBristla Icon#30 Bristla
Tocotoco Icon#27 TocotocoHangyu Icon#32 Hangyu
Tocotoco Icon#27 TocotocoHangyu Cryst Icon#32B Hangyu Cryst

Depresso Combinaciones de Cría

A continuación se muestra la lista de todas las posibles combinaciones de cría de Depresso. Esto significa que al combinar Depresso con cualquiera de los Pals listados a continuación, obtendrás el Pal hijo especificado. El género de los padres es inconsecuente siempre y cuando tengan diferentes géneros.

Padre 1Padre 2Hijo
Sparkit Icon#7 SparkitDepresso Icon#17 DepressoFoxparks Icon#5 Foxparks
Depresso Icon#17 DepressoHangyu Icon#32 HangyuFoxparks Icon#5 Foxparks
Depresso Icon#17 DepressoHangyu Cryst Icon#32B Hangyu CrystFoxparks Icon#5 Foxparks
Gumoss Icon#13 GumossDepresso Icon#17 DepressoRibbuny Icon#39 Ribbuny
Depresso Icon#17 DepressoMau Cryst Icon#24B Mau CrystSparkit Icon#7 Sparkit
Cattiva Icon#2 CattivaDepresso Icon#17 DepressoHangyu Icon#32 Hangyu
Vixy Icon#14 VixyDepresso Icon#17 DepressoHangyu Icon#32 Hangyu
Depresso Icon#17 DepressoCremis Icon#18 CremisHangyu Icon#32 Hangyu
Depresso Icon#17 DepressoMau Icon#24 MauLifmunk Icon#4 Lifmunk
Depresso Icon#17 DepressoBristla Icon#30 BristlaPengullet Icon#10 Pengullet
Haz clic aquí para mostrar las combinaciones de cría restantes 111
Depresso Icon#17 DepressoDaedream Icon#19 DaedreamSwee Icon#53 Swee
Depresso Icon#17 DepressoFuddler Icon#22 FuddlerSwee Icon#53 Swee
Tanzee Icon#8 TanzeeDepresso Icon#17 DepressoBristla Icon#30 Bristla
Depresso Icon#17 DepressoKelpsea Icon#81 KelpseaBristla Icon#30 Bristla
Depresso Icon#17 DepressoKelpsea Ignis Icon#81B Kelpsea IgnisBristla Icon#30 Bristla
Depresso Icon#17 DepressoKillamari Icon#23 KillamariTocotoco Icon#27 Tocotoco
Depresso Icon#17 DepressoRibbuny Icon#39 RibbunyTocotoco Icon#27 Tocotoco
Depresso Icon#17 DepressoSwee Icon#53 SweeTocotoco Icon#27 Tocotoco
Depresso Icon#17 DepressoLoupmoon Icon#46 LoupmoonWixen Icon#76 Wixen
Depresso Icon#17 DepressoLovander Icon#69 LovanderWixen Icon#76 Wixen
Depresso Icon#17 DepressoRushoar Icon#20 RushoarKelpsea Icon#81 Kelpsea
Depresso Icon#17 DepressoLeezpunk Ignis Icon#45B Leezpunk IgnisKelpsea Icon#81 Kelpsea
Depresso Icon#17 DepressoMaraith Icon#66 MaraithKelpsea Icon#81 Kelpsea
Lifmunk Icon#4 LifmunkDepresso Icon#17 DepressoFlambelle Icon#70 Flambelle
Pengullet Icon#10 PengulletDepresso Icon#17 DepressoJolthog Icon#12 Jolthog
Jolthog Icon#12 JolthogDepresso Icon#17 DepressoJolthog Icon#12 Jolthog
Jolthog Cryst Icon#12B Jolthog CrystDepresso Icon#17 DepressoJolthog Icon#12 Jolthog
Depresso Icon#17 DepressoRobinquill Terra Icon#48B Robinquill TerraWoolipop Icon#34 Woolipop
Depresso Icon#17 DepressoVerdash Icon#77 VerdashWoolipop Icon#34 Woolipop
Depresso Icon#17 DepressoFelbat Icon#94 FelbatWoolipop Icon#34 Woolipop
Depresso Icon#17 DepressoNox Icon#21 NoxFlopie Icon#28 Flopie
Depresso Icon#17 DepressoWoolipop Icon#34 WoolipopKillamari Icon#23 Killamari
Depresso Icon#17 DepressoDazzi Icon#62 DazziKillamari Icon#23 Killamari
Penking Icon#11 PenkingDepresso Icon#17 DepressoLoupmoon Icon#46 Loupmoon
Depresso Icon#17 DepressoGrintale Icon#52 GrintaleLoupmoon Icon#46 Loupmoon
Depresso Icon#17 DepressoSurfent Terra Icon#65B Surfent TerraLoupmoon Icon#46 Loupmoon
Depresso Icon#17 DepressoElphidran Icon#80 ElphidranLoupmoon Icon#46 Loupmoon
Depresso Icon#17 DepressoElphidran Aqua Icon#80B Elphidran AquaLoupmoon Icon#46 Loupmoon
Depresso Icon#17 DepressoCinnamoth Icon#41 CinnamothCaprity Icon#35 Caprity
Depresso Icon#17 DepressoWumpo Botan Icon#91B Wumpo BotanCaprity Icon#35 Caprity
Depresso Icon#17 DepressoFlopie Icon#28 FlopieFuack Icon#6 Fuack
Depresso Icon#17 DepressoGaleclaw Icon#47 GaleclawDazzi Icon#62 Dazzi
Depresso Icon#17 DepressoRobinquill Icon#48 RobinquillDazzi Icon#62 Dazzi
Depresso Icon#17 DepressoGorirat Icon#49 GoriratDazzi Icon#62 Dazzi
Depresso Icon#17 DepressoVaelet Icon#78 VaeletDazzi Icon#62 Dazzi
Depresso Icon#17 DepressoFenglope Icon#93 FenglopeNox Icon#21 Nox
Foxparks Icon#5 FoxparksDepresso Icon#17 DepressoHoocrates Icon#15 Hoocrates
Depresso Icon#17 DepressoFlambelle Icon#70 FlambelleHoocrates Icon#15 Hoocrates
Depresso Icon#17 DepressoUnivolt Icon#56 UnivoltGaleclaw Icon#47 Galeclaw
Depresso Icon#17 DepressoBlazehowl Noct Icon#84B Blazehowl NoctGaleclaw Icon#47 Galeclaw
Depresso Icon#17 DepressoIncineram Icon#40 IncineramFenglope Icon#93 Fenglope
Depresso Icon#17 DepressoIncineram Noct Icon#40B Incineram NoctFenglope Icon#93 Fenglope
Depresso Icon#17 DepressoSurfent Icon#65 SurfentFenglope Icon#93 Fenglope
Depresso Icon#17 DepressoAnubis Icon#100 AnubisFenglope Icon#93 Fenglope
Depresso Icon#17 DepressoCelaray Icon#25 CelarayRushoar Icon#20 Rushoar
Depresso Icon#17 DepressoMelpaca Icon#36 MelpacaRushoar Icon#20 Rushoar
Depresso Icon#17 DepressoReindrix Icon#59 ReindrixRushoar Icon#20 Rushoar
Rooby Icon#9 RoobyDepresso Icon#17 DepressoKelpsea Ignis Icon#81B Kelpsea Ignis
Depresso Icon#17 DepressoWixen Icon#76 WixenKelpsea Ignis Icon#81B Kelpsea Ignis
Depresso Icon#17 DepressoLeezpunk Icon#45 LeezpunkTanzee Icon#8 Tanzee
Depresso Icon#17 DepressoLunaris Icon#63 LunarisTanzee Icon#8 Tanzee
Depresso Icon#17 DepressoGobfin Icon#31 GobfinDaedream Icon#19 Daedream
Depresso Icon#17 DepressoCawgnito Icon#44 CawgnitoDaedream Icon#19 Daedream
Depresso Icon#17 DepressoAzurobe Icon#82 AzurobeLovander Icon#69 Lovander
Depresso Icon#17 DepressoPetallia Icon#87 PetalliaCawgnito Icon#44 Cawgnito
Depresso Icon#17 DepressoKitsun Icon#61 KitsunLunaris Icon#63 Lunaris
Depresso Icon#17 DepressoDigtoise Icon#67 DigtoiseLunaris Icon#63 Lunaris
Depresso Icon#17 DepressoBroncherry Aqua Icon#86B Broncherry AquaLunaris Icon#63 Lunaris
Depresso Icon#17 DepressoSibelyx Icon#79 SibelyxEikthyrdeer Icon#37 Eikthyrdeer
Depresso Icon#17 DepressoKingpaca Icon#89 KingpacaEikthyrdeer Icon#37 Eikthyrdeer
Depresso Icon#17 DepressoWumpo Icon#91 WumpoEikthyrdeer Icon#37 Eikthyrdeer
Depresso Icon#17 DepressoElizabee Icon#51 ElizabeeDigtoise Icon#67 Digtoise
Depresso Icon#17 DepressoReptyro Icon#88 ReptyroDigtoise Icon#67 Digtoise
Depresso Icon#17 DepressoJormuntide Icon#101 JormuntideDigtoise Icon#67 Digtoise
Depresso Icon#17 DepressoJormuntide Ignis Icon#101B Jormuntide IgnisDigtoise Icon#67 Digtoise
Depresso Icon#17 DepressoMozzarina Icon#29 MozzarinaMaraith Icon#66 Maraith
Depresso Icon#17 DepressoEikthyrdeer Icon#37 EikthyrdeerMaraith Icon#66 Maraith
Depresso Icon#17 DepressoVanwyrm Icon#71 VanwyrmRobinquill Icon#48 Robinquill
Depresso Icon#17 DepressoBushi Icon#72 BushiFelbat Icon#94 Felbat
Depresso Icon#17 DepressoRayhound Icon#60 RayhoundDirehowl Icon#26 Direhowl
Depresso Icon#17 DepressoTombat Icon#68 TombatDirehowl Icon#26 Direhowl
Depresso Icon#17 DepressoKatress Icon#75 KatressGorirat Icon#49 Gorirat
Depresso Icon#17 DepressoBlazehowl Icon#84 BlazehowlGorirat Icon#49 Gorirat
Depresso Icon#17 DepressoArsox Icon#42 ArsoxGobfin Icon#31 Gobfin
Depresso Icon#17 DepressoChillet Icon#55 ChilletGobfin Icon#31 Gobfin
Depresso Icon#17 DepressoDinossom Lux Icon#64B Dinossom LuxGobfin Icon#31 Gobfin
Depresso Icon#17 DepressoBeakon Icon#73 BeakonChillet Icon#55 Chillet
Depresso Icon#17 DepressoFoxcicle Icon#57 FoxcicleBeegarde Icon#50 Beegarde
Depresso Icon#17 DepressoRagnahawk Icon#74 RagnahawkReindrix Icon#59 Reindrix
Depresso Icon#17 DepressoFaleris Icon#105 FalerisReindrix Icon#59 Reindrix
Depresso Icon#17 DepressoPyrin Icon#58 PyrinCelaray Icon#25 Celaray
Depresso Icon#17 DepressoCaprity Icon#35 CaprityRooby Icon#9 Rooby
Depresso Icon#17 DepressoSweepa Icon#54 SweepaDumud Icon#43 Dumud
Depresso Icon#17 DepressoMossanda Lux Icon#33B Mossanda LuxMelpaca Icon#36 Melpaca
Depresso Icon#17 DepressoDirehowl Icon#26 DirehowlFuddler Icon#22 Fuddler
Depresso Icon#17 DepressoBeegarde Icon#50 BeegardeFuddler Icon#22 Fuddler
Depresso Icon#17 DepressoGobfin Ignis Icon#31B Gobfin IgnisGumoss Icon#13 Gumoss
Depresso Icon#17 DepressoIce Kingpaca Icon#89B Ice KingpacaMozzarina Icon#29 Mozzarina
Depresso Icon#17 DepressoPaladius Icon#108 PaladiusRayhound Icon#60 Rayhound
Depresso Icon#17 DepressoNecromus Icon#109 NecromusRayhound Icon#60 Rayhound
Depresso Icon#17 DepressoFrostallion Noct Icon#110B Frostallion NoctRayhound Icon#60 Rayhound
Depresso Icon#17 DepressoJetragon Icon#111 JetragonRayhound Icon#60 Rayhound
Depresso Icon#17 DepressoRelaxaurus Icon#85 RelaxaurusKitsun Icon#61 Kitsun
Depresso Icon#17 DepressoRelaxaurus Lux Icon#85B Relaxaurus LuxKitsun Icon#61 Kitsun
Depresso Icon#17 DepressoMammorest Cryst Icon#90B Mammorest CrystKitsun Icon#61 Kitsun
Depresso Icon#17 DepressoWarsect  Icon#92 Warsect Broncherry Icon#86 Broncherry
Depresso Icon#17 DepressoQuivern Icon#95 QuivernBroncherry Icon#86 Broncherry
Depresso Icon#17 DepressoAstegon Icon#98 AstegonFoxcicle Icon#57 Foxcicle
Depresso Icon#17 DepressoOrserk Icon#106 OrserkFoxcicle Icon#57 Foxcicle
Depresso Icon#17 DepressoCryolinx Icon#83 CryolinxTombat Icon#68 Tombat
Depresso Icon#17 DepressoFrostallion Icon#110 FrostallionTombat Icon#68 Tombat
Depresso Icon#17 DepressoHelzephyr Icon#97 HelzephyrArsox Icon#42 Arsox
Depresso Icon#17 DepressoGrizzbolt Icon#103 GrizzboltArsox Icon#42 Arsox
Depresso Icon#17 DepressoLyleen Noct Icon#104B Lyleen NoctArsox Icon#42 Arsox
Depresso Icon#17 DepressoBroncherry Icon#86 BroncherryLeezpunk Icon#45 Leezpunk
Depresso Icon#17 DepressoMenasting Icon#99 MenastingDinossom Icon#64 Dinossom
Depresso Icon#17 DepressoLyleen Icon#104 LyleenDinossom Icon#64 Dinossom
Depresso Icon#17 DepressoSuzaku Icon#102 SuzakuBlazehowl Icon#84 Blazehowl
Depresso Icon#17 DepressoSuzaku Aqua Icon#102B Suzaku AquaBlazehowl Icon#84 Blazehowl
Depresso Icon#17 DepressoShadowbeak Icon#107 ShadowbeakBlazehowl Icon#84 Blazehowl
Depresso Icon#17 DepressoBlazamut Icon#96 BlazamutKatress Icon#75 Katress

Palworld Depresso Técnicas activas

Depresso tiene 7 habilidades activas además de su habilidad de pareja principal Inoculación de cafeína.

Nombre de TécnicaDescripción de TécnicaNivel de Desbloqueo
Tiro tóxicoLanza barro venenoso contra el rival.1
TirocienoLanza barro pastoso contra el rival.7
Orbe oscuroDispara una bola de oscuridad que persigue lentamente al enemigo.15
Misil de hieloCrea un témpano de hielo afilado sobre su cabeza y lo lanza contra el rival.22
Estallido sombríoLibera rápidamente energía oscura que impacta en la zona circundante.30
Bola fatídicaCrea una enorme bola de energía oscura y la lanza a toda velocidad contra el rival.40
Haz oscuroSe carga de energía oscura y lanza un potente rayo contra el rival.50
Pal anterior
Siguiente Pal
Ver esta página en: US flag icon DE flag icon
TAGS
Author Gosu No0b profile picture
Written by:
Sometimes articles on our website are a team effort. Such articles are published under the Gosu Noob author and that means the thing you are reading was created by the whole crew.

YOU MAY ALSO READ

CLICK TO POST A COMMENT