The Last of Us 2 'Tunnels' collectibles - Trading Card, Journal Entry, Artifact, Workbench locations guide
Seattle Day 1 Tunnels is a subchapter in The Last of Us 2. Exploring this area will give you the opportunity to snatch several collectibles, many of which will give you further insight into the things that happened. In case you get stuck looking for the last few missing ones, like we did, we’ve decided to write this TLOU2 Tunnels collectible locations in Seattle Day 1 guide, to help you out.

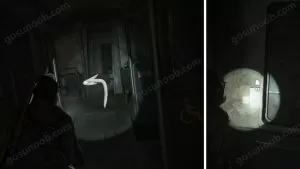
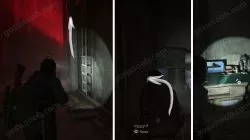
The Subway Note Artifact Location
This section starts as you enter the tunnels where a bright red light shines on the enemies near the train cars. As you enter the train car, continue to the end of it, and just as you go through the door of the last section look to your left. The Subway Note (1/5) will be there, on the wall.
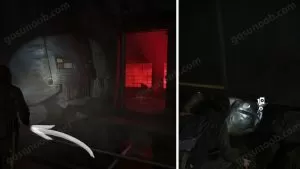
Imp Trading Card Location
Farther ahead, you’ll crawl below a train and continue toward the entrance with a red light in the distance. Do not go through yet, but rather check the area below the train car nearby. It hides the Imp trading card (1/3).
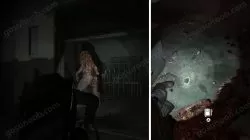
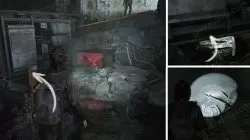
Workbench & Journal Entry
Continue forward, into the room with the red light, up the metal ladders, and right behind a blue door is where the only workbench (1/1) is. This room is just before the rope swinging and the long crawling section. After the workbench and the part with a lot of ammunition, ingredients, supplements and a medkit comes a new type of enemy – the shambler. Once you defeat it, you can take a journal entry (1/1) from his body.
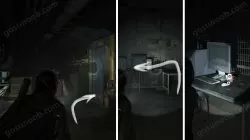
Daniela Star Trading Card & Wittled Statue Artifact
Farther into the facility you’ll pass by that bright red light, then go under a metal gate that crushes a table and stops you from returning. In the new area, you’ll follow the large pipes toward the Station Acess and into the storage room on your right. Continue forward here, jump over the desk, crawl under a metal bar and into the room with a desk. This desk hides the Dr. Daniela Star Trading Card (2/3). Next to the desk is a door you can now open. Next to the Storage room is a Lounge area. Find a table there with a microwave on it, and you’ll get to loot the Wittled Statue artifact (2/5).
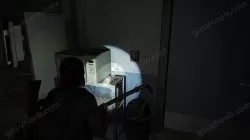
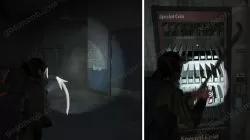
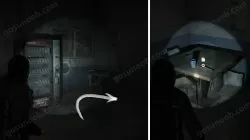
Soda Can Note & Locker Room Note Artifact Locations
Don’t leave the lounge yet – go to the soda machine close to the lunch table with four chairs instead. Break the glass on the soda machine and you’ll get the Soda Can Note artifact (3/5). Just a few steps away, on another wooden lunch table, is the Locker Room Note artifact (4/5).
The Lounge also contains a locked door with a code. To find out the correct combination, dig through the list of artifacts you’ve picked up. The hint for the last two digits are the numbers that you haven’t used on the first three entries. The stash has ammunition, ingredients, supplements, and more.
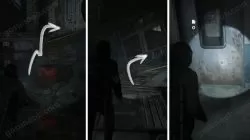
Bastet Trading Card & Subway Station Note Artifact
You are almost out of the tunnel now. As the breath of fresh air clears the stench you went through, you’ll have to make your way over some train wrecks. Look out for the red crate / soda machine / whatever it is that is on our main path, and go left from it and under the train. In this new area, inside a suitcase, is the third trading card – Bastet (3/3). As you climb on top of a fallen red box, then onto a train car, you’ll be able to enter another car. As soon as you enter, look right, and you’ll see the Subway Station Note artifact (5/5) on a door there. From this moment on it is rather straightforward until the next part, called Theatre.
Images and text not good enough for you? No worries! We’ve got your covered with a video guide of the Tunnel collectibles that can be found here.
Previous Chapter
Seattle Day 1: Channel 13Next Chapter
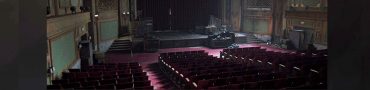
Seattle Day 1: The Theatre