Zelda Tears of the Kingdom Shrine Locations Map
Shrines are special locations in Legend of Zelda: Tears of the kingdom spread out all over the map. They are mini dungeons that contain puzzles of varying difficulty. Finishing one rewards you with Light of Blessing. This special item is exchanged for Heart or Stamina containers. You need 4 Lights of Blessing from Zelda TOTK Shrines to get an upgrade of your health or stamina wheel. This makes them essential for game progression. There are over a 100 shrine locations in Zelda Tears of the Kingdom. On the map bellow you will be able to find them all. Our Zelda Tears of the Kingdom Shrine locations map is zoomable and draggable and you can switch between the sky and ground levels of the game to see all the shrines you can find there. Clicking on each Zelda TOTK map pin provides you with additional information.
Zelda Tears of the Kingdom Great Sky Island Shrine Locations
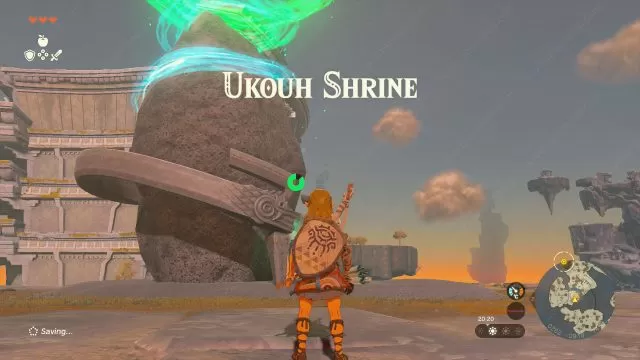
This is the starting island in the sky and you need to complete all four shrines to progress further. Each of the shrines here provides you with a new Zelda Tears of the Kingdom ability. After the first Ukouh shrine you can head straight for the cold region to the southeast. Other path is to the southwest, across the lake. Either way you’ll need to get some cold resistance food to progress. Getting all four shrines will unlock the secrets of the Temple of Time and introduce you to the new mechanics of Zelda Tears of the Kingdom.
- Ukouh – The Ability to Create – This is the first shrine you’ll encounter in the game. You get the Ultrahand ability here.
- In-Isa – The Ability to Combine – You need to cross the lake by building your first raft in Zelda: Tears of the Kingdom to get to this shrine. Your reward for completing it is the Fuse ability that lets you combine your weapon with various items that increase its damage and add other properties.
- Gutanbac – The Ability to Rise – This is the last shrine you need to do to start unlocking the Temple of Light. You also get the Ascend ability.
- Nachoyah – The Ability to Rewind – You’ll get teleported here from Temple of Time, once you’ve completed other three shrines on the Great Sky Island. You will get the Recall ability that is crucial for progressing the story further.
Zelda TOTK Central Hyrule Shrine Locations
Once you finally reach the ground you’ll be in the familiar surroundings of Central Hyrule. Make your way to Lookout Landing to continue the main quest and it will lead you all over this zone. Along the way visit shrines because they are mostly tutorial ones and with easy Lights of Blessing for the taking. Still, Central Hyrule is home to many Zelda Tears of the Kingdom shrine locations and deserves thorough exploration.
- Kyononis – Combat Training – You’ll probably find this shrine as you are doing the first main quest for Purah. It teaches you some combat basics.like side hop, backflip, perfect guard (parry) and charged attacks. You have to complete all of these moves to damage the warrior construct.
- Jiosin – Shape Rotation – Found just south of Lookout Landing, next to Hyrule Field Chasm.
- Susuyai – A Spinning Device – You’ll learn how to use small wheel Zonai device here.
- Mayachin – A Fixed Device – Found on your way to Hyrule Field Skyview Tower. Requires you to build just the right structure to get the ball where it needs to be.
- Teniten – Combat Training: Throwing – The game teaches you how to throw weapons for maximum damage. Easy Blessing of Light here.
- Tsutsu-um – The Stakes Guide You – You’ll learn how to use the Stakes Zonai device. You have to place them into the walls at just the right position to reach the chest and have the ball fall into the switch. Great spot for traveling quickly to Outskirt Stable.
- Kamizun – Proving Grounds: Beginner – This is one of the first shrines that takes all your equipment away and you have to defeat enemies using your abilities and what little decayed weapons they have for you.
- Yamiyo – Combat Training:Throwing – Tutorial shrine on how to throw materials quickly at enemies and the surroundings. You have to do what the game tells you to successfully defeat the enemy. Your other attacks are ineffective here. Use the provided Fire Fruit for a quick Light of Blessing.
- Serutabomac – The Way Up – Found on the north side of Hyrule Castle. Nice teleport point if you decide to explore the ground ruins of the castle. All about using your Ascend ability.
- Tukarok – Forward Force – In the little grove next to Wetland Stable and a good fast travel point for visiting it. Also, one of the shrines everyone solves differently. The right way is to attach concrete or wood boards to spinning wheels. Click on the name of this shrine to read the full guide.
- Tenmaten – Rauru’s Blessing – To find this shrine you have to enter Elma Knolls Well, that is a bit southwest from the shrine’s location. Great place for lots of Brightbloom seeds and some Luminous stone.
- Kiuyoyou – Fire and Ice
- Riogok – Force Transfer – Located on the western edge of the Great Plateau, where Breath of the Wild began. The trick is to use one concrete rod to interact with the rotating cog and the other rod, you used to open the door for the other rod, should be placed vertically between the big platform and the smaller one above. Then as the cog turns it will lift the big platform and the concrete rod will push the smaller platform to shrine completion level. Ascend into the platform to get there yourself. To get the chest you need to use all thre concrete rods to make a pole you can climb up to the chest. Use Recall on the rotating cog to keep the door open.
- Kyokugon – Alignment of the Circles – Found underneath the Great Plateau. To reach it find an entrance into the Great Plateau Foothill Cave, which is southeast of the shrine’s location. Look at the bottom of the Great Plateau wall and break a rock barrier to enter. The shrine’s solution lies in you looking at the ceiling and for the chest us your Ultrahand ability on the floor.
- Tadarok – Fire and Water – Found inside the cave behind a waterfall at the River of the Dead on the Great Plateau. Tip for solving this Zelda TTOK Shrine is to know that dropping Ice cubes into lava creates stone slabs that help you walk on lava for some reason.
Hebra Shrine Locations
- Sinakawak – An Uplifting Device – Next to New Serenne Stable, for which it provides fast travel service.
- Mayauusiy – Building Blocks – Found inside the Forgotten Temple structure at the north end of the Tanagar Canyon. You’ll have to visit the Forgotten Temple as part of the quest with Impa and geoglyphs, but you can visit without the quest.
- Runakit – Built to Carry – Next to Hyrule Ridge Chasm.
- Gatakis – Ride the Winds – On the west side of Rito Village, bellow the general store. There’s a Korok right across it. Your travel point for Rito village once you get the Blessing of Light.
- Nouda – Proving Grounds: Intermediate – Found underground at the end of the Kopeeki Drifts Cave. Entrance into the cave is a bit northwest of the shrine’s location. Best tactic for defeating this shrine’s trial is to use Ultrahand on the rafts with the enemies and falling in water disposes of them.
- Orochium – Courage to Fall – Travel point for stable. You’ll need some Cold resistance to get here.
- Makurukis – Combat Training : Archery – Tabantha Bridge Stable fast travel point. Easy headshot teaching course.
- Eutoum – Proving Grounds: Infiltration
Eldin Shrines
- Ekochiu – Rise and Fall – Best spot if you want to reach Woodland Stable quickly and start your trek towards Goron City. Use your recall ability to cross all obstacles. Climb on the grated boxes before using it to reach high and far away platforms.
- Timawak – Against the Flow – Next to Bedrock Bistro so you can quick travel here when finishing quests.
- Marakuguc – Wheeled Wonders – Overlooking Gerudo Town.
- Mayak – Timely Catches – Check out the Eldin Great Skeleton to the east of this shrine.
- Sikukuu – Spinning Gears
- Musanokir – Swing to Hit
- Jiotak – Rauru’s Blessing – At the end of the Isle of Rabac Gallery cave. Entrance into the cave is reached by riding the right-hand side mining cart from Goron City northern side.
- Sibajitak – Alignment – Use Recall and Ascend to align the spinning tower and reach the end of the Zelda Tears of the Kingdom Shrine
- Isisim – Proving Grounds: In Reverse – You need to progress the main story in Goron to unlock special ability by their leader. Use it to break the red rocks blocking the entrance into the cave located just west of the shrine’s location. Shrine is buried under a big rubble of rocks inside YunoboCo HQ East Cave.
- Sitsum – A Controlling Device – You get to this shrine by riding a mining cart from halfway up the Death Mountain. Best done if you have Yunobo with you. You get introduced to steering stick device here. Remember you can go backwards with vehicles as well. At the end put a steering stick from the truck device onto the glider device.
Lanayru Shrine Locations in Zelda Tears of the Kingdom
- Jikais – Jailbreak – You want to move the first stone blocks in such way that you can Ascend into them and then through the coves with the torches to ascend to the top. Use the stone slabs to ascend again and then with ultrahand make a platform to escape the jail.
- Yomizuk – Rauru’s Blessing – Found inside Tarm Point Cave. Entrance into the cave is at the south point of the peninsula. Side quest True Romance will take you here.
- Apogek – Wings on the Wind – On a side of the cliff of Ja’Abu Ridge
- Ihen-a – Midair Perch – Found at Mipha Court, which makes it a great fast traveling point for the main Zora’s Domain questline. Use the Hover Stone Zonai device, that stays suspended in air where you put it with Ultrahand, to create bridges and platforms to help you reach the end of the puzzle.
- Mogawak – The Power of Water – Found bellow the main bridge that leads into Zora’s Domain. You can glide to it and come back to the bridge with a very long ladder.
- Joniu – Rauru’s Blessing – Directly south of the shrine’s location is entrance into the Ralis Channel cave. In-game coordinates of the entrance are 2911, 0171, 0161. When you enter you’ll see a river that is slowly flowing towards the entrance of the cave. This means swimming will be neigh impossible without full Zora Armor or lots of stamina. Use the materials provided at the entrance to build a Zonai device powered boat and get to the end of the cave to find the shrine.
- Jonsau – Deep Force – Use Ultrahand to sink the balls as deep as they go to activate the switches when it goes up out of the water. Chest is inside the water.
Necluda
- Makasura – An Upright Device – Found on a hill overlooking Kakariko Village. Use the Zonai device to create upright platforms to use Ascend on and in the end use it to create a large catapult.
- Eshos – Combat Training: Shields – Good spot to teleport to if you want to visit Dueling Peaks Stable and the nearby Great Fairy Cotera.
- Sifumim – Proving Grounds: Flow – Overlooking Lurelin Village
- Bamitok – Rauru’s Blessing – Inside Mount Dunsel Cave. Cave entrance is at 3290, -3333, 0064 through a lake southeast of the shrine’s location (next to Gama Cove).
- Zanmik – Scoop It Out – Hateno Village fast travel point.
- Mayahisik – Rauru’s Blessing – Found inside Retsam Forest Cave that can be accessed by breaking a rock wall. You’ll be taken here by Robbie (Goggles) once he returns to his Hateno Ancient Tech Lab, that is just up the hill, as part of your Purah Pad Shrine Sensor upgrade.
Faron
- Joju-u-u – Building Bridges – High above the Lakeside Stable, for which it provides a fast travel point.
- Utsushok – Long or Wide – Closest shrine to the Highland Stable.
- Jiukoum – Built for Rails – Found above the Spring of Courage. Put the extra concrete slabs vertically underneath the slabs on the rails to prevent them from falling off.
Gerudo Desert Shrine Locations
- Rakakudaj – Rauru’s Blessing – You have to complete the Gerudo Canyon Crystal shrine quest. The crystal you need to find to bring to the shrine south of it at -1899, -2342, -0001. There’s enough components a few meters from the crystal to build a 6-wheel steer-able vehicle and then put the crystal onto this vehicle and drive it upriver all the way to the shrine’s location.
- Kitawak – Upward and Forward – On top of a tall hill overlooking the Gerudo Desert. Try using Recall on one of the sky stones nearby to reach it without climbing.
- Motsusis – Rauru’s Blessing – Found inside the middle of the South Lomei Labyrinth. Follow the acorsn from the entrance in the north to find it.
- Turakamik – Hidden Metal
- Suariwak – Rauru’s Blessing – You have to have full Yiga Clan Armor set. You will come across a door behind a waterfall you can enter only if you are wearing the full set. There you get a quest called Yiga Clan Exam. Once you finish this you get access to this shrine.
- Mayatat – A Sliding Device – Use recall on the first sleds and then build a sled with control and fan to drive around sand in the next room.
- Soryotanog – Buried Light – On top of Gerudo Town’s Throne building. Use fans to blow away sand piles and mirror devices to open the final room.
- Irasak – Rauru’s Blessing – Best found after you finish the Gerudo main story.
- Miryotanog – Proving Grounds: Lure
- Kudanisar – Bridging the Sands
- Rotsumamu – A Balanced Plan
Akkala Shrine Locations – Zelda TOTK
- Rasitakiwak – Proving Grounds: Vehicles – Visit this shrine to see all the different vehicles you can make. There are some tank like monstrosities you can create.
- Sinatanika – Combat Training: Sneakstrike
- Jochi-iu – Courage to Pluck
- Rasiwak – Flotational Brilliance – Found on the beach across from the labyrinth. There’s a cave nearby you can check out.
- Kamatukis – A Precise Strike
- Gemimik – Turbine Power – Put the rotor blades onto the central battery. Use the metal slab to connect the newly created fan to a power source. Glide on the air current now created by the fan to get to the platform with flamethrower heads. Install the flamethrower on the rotating mechanism instead of the fan to activate all torches before they get extinguished by the sprinklers.
- Gatanisis – A Well-Timed Bounce – Half way down the edge of the eastern cliff, next to Knuckle Island.
Hebra Sky Shrine Locations
The best time to start visiting Hebra Sky shrines in Zelda Tears of the Kingdom is when you are on your way to the Wind Temple part of the main quest. Finish the Rito main quest and then you’ll unlock a large portion of the sky map.
- Kahatanaum – Rauru’s Blessing – Find this shrine on your way to the Wind Temple.
- Mayaumekis – Downward Force
- Ijo-o – More than Defense – Use shields with various fused Zonai devices to get past the puzzle obstacles. For the last puzzle fuse a rocket to a rusty shield and fly away my friends.
- Taunhiy – Combat Training: Archery – Use Lindor’s Brow Skyview Tower and glide southwest to a circular/cylindrical structure. Go all the way to its bottom and you’ll see an island with a water pool. Next to the water pool is a steward sentry. Talk to him and then do his challenge. This unlocks the shrine.
Lanayru Sky
- Igoshon – Orbs of Water – Found on your way to the Water Temple if you go exploring a bit. Use the Recall ability with water orbs to conquer this puzzle.
- Sihajog – Rauru’s Blessing – From Mount Lanayru Skyview Tower glide northeast using all the sky islands in-between to get to the cylindrical structure with an island in the bottom. That island in the bottom has a steward you need to talk to and do his challenge. Once you complete it the Zelda TOTK shrine will appear.
Necluda Sky
- Josiu – Rauru’s Blessing – Located in the North Necluda Sky Archipelago this shrine needs to be activated by bringing the Shrine Crystal to the shrine spot. You need to operate the mechanism to connect the south island with the island to the east and then run over to the now connected island to pick up the crystal. You should use all the mechanisms there to bring the crystal back. There are also two chests with Old Maps on this island group.
- Ukoojisi – Rauru’s Blessing – You need to bring a crystal to the shrine location to unlock the shrine itself. This is the West Necluda Sky Crystal Shrine Quest. The crystal is on the island to the northeast of the shrine location. You can get there by building a flying glider on the island just east of the shrine. Get the crystal onto another glider and fly over to the Zelda Tears of the Kingdom shrine location to collect a free Light of Blessing.
Central Hyrule Sky Shrine Locations
- Simosiwak – Proving Grounds: Lights Out – From Thyphlo Ruins Skyview Tower glide directly south towards a tall cylindrical shaped structure. You’ll have to use many islands in between and some vehicles. Your goal is the island at the bottom of the cylinder with a water pond in it. Talk to the steward there and do the challenge to reveal this shrine.
Eldin Sky Shrine Locations
- Kadaunar – Water Makes a Way
Gerudo Sky Shrine Locations
- Siyamotsus – Unlit Blessing – From Gerudo Canyon Skyview Tower glide south/south-east to the first sky island. Build a Zonai glider with three fans and if you have a steering stick use it. Use the vehicle to fly towards the big cube in the sky. This is the South Lomei Castle Top Floor Labyrinth and the shrine is at the entrance.
You missed one in Hebra Region