Zelda BoTW Champion Revali's Song - How to Solve
Champion Revali’s Song is a new quest in Zelda Breath of The Wild. It’s part of the Champions’ Ballad DLC. You’ll begin the quest by talking to Kass near a monument. He’ll tell you all about his teacher’s unfinished song, and ask you to help him find the missing verses. You’ll have to complete the trials mentioned in the song in order to find new secret shrines and finish the quest. The monument will show you small images of the locations you’re supposed to visit. It’s a proper brain-teaser, and you might easily get stuck. That’s why we’ve decided to write a guide to show you how to solve Champion Revali’s Song in Zelda BoTW.

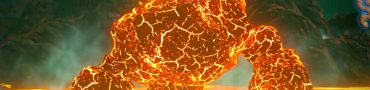
Shoot the flame dragon’s horn
In order to complete this challenge, you’ll have to shoot the horn of Dinraal, the first spirit. This will reveal the hidden entrance to the Shira Gomar Shrine.
Zelda BoTW Champion Mipha’s Song Riddle Solutions
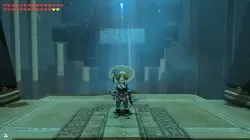
Shira Gomar Shrine
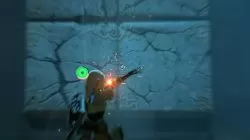
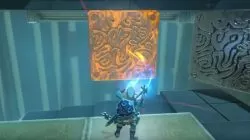
This challenge will have you aim for stillness. You’ll have to use wind turbines to get onto platforms bearing grenade launchers. Your remote bombs will be used as ammo, and you’ll have to destroy a bunch of stone walls before you reach the end and get Medoh’s Emblem.
Race down a peak rings adorn
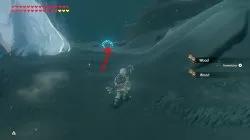
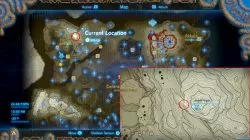
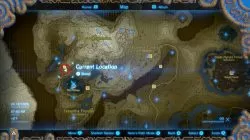
Teleport to the Goma Asaagh Shrine, near Hebra Peak (the highest point of Hebra mountain in the northwest). Melt the large iceberg on your right, then go through the pass. Turn left, and you’ll see a glowing ring in the snow further down the slope. It looks like a gateway. Jump on your shield and snowboard down the hill, making sure you go through every ring. A wisp will guide you, so you won’t be able to lose your way. If you slow down or stop, monsters will start appearing. Once you pass the final one, the entrance to Kiah Toza Shrine will appear.
Kiah Toza Shrine
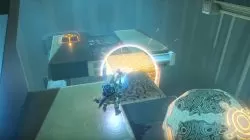
Once inside, you’ll have to master the orb. This means preventing it from falling into the abyss, instead leading it the right way. You’ll do this by manipulating the cubes and platforms in the room, so you cordon the ball off. In the end, when it gets to the wide slope, you’ll have to use stasis to get it across the gap and into the hole. When you finish, you’ll get Medoh’s Emblem.
Shoot four targets to win
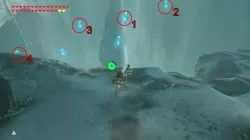
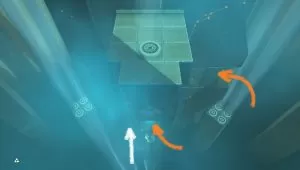
Travel to Sha Warvo Shrine, a bit northwest from Rito Village, in the western part of the map. Go around the bend to find a flight range, where columns of air rise from the chasm. You’ll see a bunch of targets in the distance, on the clifface and the central spire. Jump into the chasm and open up your glider to let the columns take you up. Draw your bow and shoot four targets – it’s possible you have to shoot four specific ones, in a specific order, so we’ve listed the ones we know work. This will uncover the entrance to Noe Rajee Shrine.
Noe Rajee Shrine
The shrine is about using the four winds. The point of this shrine is to shoot the orange crystals which will activate the four fans in the corners of the rotating platform. Use the air currents to get higher, then shoot new crystals to activate new turbines. Once you get to the top, you’ll find another Medoh’s Emblem.
How to Kill Windblight Ganon in Illusory Realm?
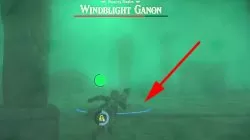
The simplest way to kill Windblight Ganon in the Illusory Realm is to establish an attack pattern and follow it. Also, you’ll want have Urbosa’s Fury at the ready. As with other beasts from the Illusory Realm, the weapons you’ll have on hand are limited. In this case, all you’ll have is a bow with a hundred arrows (plus five Bomb Arrows) and a Feathered Sword. So let’s get into the nitty-gritty.
When the fight starts, run over to the wind gust shooting upwards (they have a blue, glowing circle around them) and use your glider to fly up to Windblight Ganons level. Watch out for his projectiles. Take aim with the bow and shoot it in the eye. Three arrows should be enough to get him to fall, but you can fire off a couple more for the extra damage. When Ganon is down, run or glide over. He’ll get up fairly quickly, so best use Stasis to keep him down. At this point, you can either use your sword to do damage, or use Urbosa’s Fury. If you have only one Fury on hand, we recommend you save it for later. Keep repeating this pattern until Windblight Ganon is at half health.
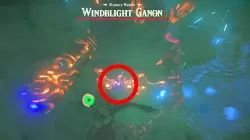
When down to half health, Ganon becomes angry, and can now summon various projectiles, some of which seem to home in on you. However, the pattern describe above still works, you’ll just have to be a bit more careful. Just use the wind gusts to fly up, fire arrows into Ganon’s eye, then keep pummeling him when he’s on the ground. I’d say it’s best to keep shooting him down and chipping away with the sword (or more arrows, if your sword breaks) for a bit more. After a round or two of this, shoot him down with arrows one more time, then Stasis him and charge up Urbosa’s Fury as far as you can. Before you release it, make sure Windblight Ganon is still in range. Unleash Urbosa’s Fury to deal some massive damage, possibly even killing the boss. If that doesn’t kill it, repeat the pattern again. If that was your only Urbosa’s Fury, then, you’ll have to rely on your weapons. However, if you executed the Fury correctly, Windblight Ganon will be on his last legs, anyway.
Hopefully, our guide will help you come that much closer to the final prize of the Zelda BOTW Champions’ Ballad DLC. It’s quite a journey, and they really decided to put your skills to the test. It’s a ton of fun, though. If you need further help, head on over to some of our other guides, including Champion Mipha’s Song and how to get the Zelda BoTW Master Cycle Zero, aka that sweet new motorcycle.

I’ve shoot dinaralls horn 2 times now one at midnight and once at 6 am what’s goin on cause I’m not getting a shrine
Every time that i do it, i do do it in the same order but no shrine appears. I also do shot all of them in slow motion. Am i forgetting anything?
So ive shot dinral horn twice and nothing happened. Do i have to be in a certain place when i do it?
Mist be in the right 0lace near th Roto watchman and you will see the horns begin to glow a different color
Hey so for the flight range part! Its a bit tricky actually any target will do! The trick appears to be entering flurry mode with the arrows and hitting 4 targets with in however much stamina you have! Midair of course so its one of those do it alll at once things! Hope it helps!
The targets do not need to be shot in any order. They all work.
You must shoot 4 targets while in slow motion. Doesn’t matter which targets it seems. You can’t go in and out of slow motion with the bow/glider.
Can you do the flight range part without the twilight bow? I keep hitting the same targets, pretty sure they are the same, but no shrine.
You actually don’t need a specific bow to unlock the shrine. Talk to Tulin (Teba’s son) and play the minigame, shooting as many targets as possible. That’ll make every target you shot have the Sheikah emblem on it, which you can then shoot to activate the shrine.
You can do any targets in any order, just all 4 in one breath (slo-mo using lots of stamina).
you have to break them all without getting out of slow timed mode otherwise they reset
Have to hit them all in or stamina shot
I did it with a normal bow. The easiest way is to use the four targets that make a square around you so all you have to do is turn and shoot again. Take something to boost your stamina though because you may need it as you have to hit all four in one burst. This means you can’t go back into your glider in between shots