Zelda BotW Jee Noh Shrine Walkthrough
Jee Noh shrine is one of the 120 mini dungeons in Zelda Breath of The Wild. It’s located northeast of Gerudo, just past the mountain range. To finally reach the room with the Spirit Orb, you’ll need to go through three rooms. The solution for the shrine challenge is a rather easy one, and you can complete it on more than one way. In this guide, we’ll show you how to complete On The Move challenge and give you a Zelda BotW Jee Noh shrine walkthrough.

Jee Noh Shrine Puzzle Solutions
To finish this Shrine without any problems, be sure to bring at least four arrows. We’ll use them to move the two balls in first two rooms, and to kill the two small guardians.
Zelda BoTW shrine locations map – find & complete all 120
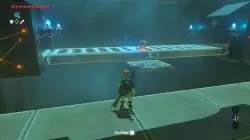
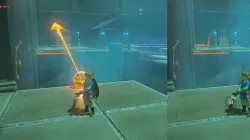
At the start of the Shrine, you’ll notice one ball on a moving platform. To make it easier, you’ll just have to shoot this ball, as it is close to the platform it needs to fall on. To make sure you don’t spend too many arrows, you can use Stasis as it passes over the goal platform. The hardest approach, the one I used for some reason, is to use the remote bomb. This way, you can save the arrow, but it will take more than one explosion to push the ball in the right direction. I don’t advise it at all. Took me almost 15 minutes to do it.
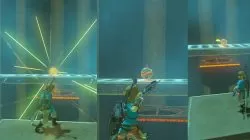
In the second room, it’s the same situation, but this time, you also have two guardians on that moving platform. They shoot lasers towards Link, and it’s best to take care of them using arrows. Since the moving platform in this room is a bit further away from the one you stand on, the remote bomb can’t reach it, and you have to shoot the ball to make it move towards the goal.
Jee Noh Treasure Chest
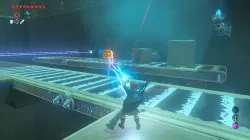
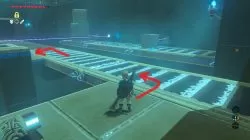
Inside the third room is where the fun starts. This is where you can spot the two moving paths with three lasers blocking the passage. Once again, you can complete this challenge in more than one way.
First thing’s first, take care of the treasure chest. It moves on the further moving platform. Use Magnesis to bring it to you. The content of this chest is rather disappointing.
Jee Noh Lasers
To solve this challenge, you have to bring the ball to the other side of the room. The easiest way for me was to bring the ball near the platform’s edge, towards its goal. Use Stasis on the ball and punch it a few times to get the boost. It will land on the other platform, from where you can put it in its place.
If you however, want to do it without getting your weapons broken due to the hits, pick up the ball and pay attention to the second, further platform. As soon as one of the larger rock blocks comes out, step on the first platform and head toward the first “safe spot” to your left. The large block from the second platform will block the laser, and you won’t get pushed into the abyss.
The second laser is where some of you might get stuck. The solution is rather simple. The Stasis rune works on this laser. Use it to stop its power and walk over to the third laser. If you have the ball still with you, carry it as well.
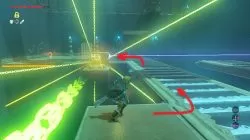
Since the third laser shoots from the second platform, just wait for one of those larger blocks once again. They will block the laser and allow you to get to the other side. Put the ball onto the switch to open the last door, and reach the final chamber with the Spirit Orb.