Mission 2: Exultia Collectibles & Secrets Locations - Doom Eternal
Exultia is the second mission in Doom Eternal. There are more than twenty collectibles and secret stashes on the level, and they range from toys, albums and slayer keys to extra lives, codex entries and secret encounters. Most of them are easy to miss, but since you can replay the mission at any time, you don’t need to collect them in one go. In this guide, we’re going to show you all Mission 2: Exultia collectibles and secrets locations in Doom Eternal.
Exultia secrets & collectibles locations
The first collectible is an extra life, and it can be found below the starting platform. Simply drop down and grab it before continuing. When you go through the first building, turn left. You’ll see a codex page on the ledge.

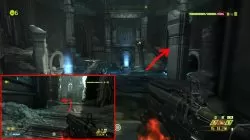
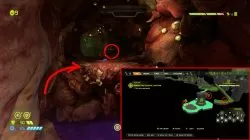
Before you descend down the tower, look at the cracked wall in the corner on the right. You can break through it to find a secret area. As you go down the tower, you’ll see a glowing rune in one of the corridors – make sure you interact with it, as it is one of the counted collectibles.
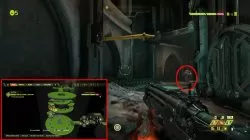
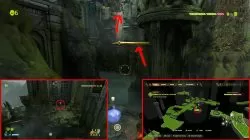
Afterwards, use the horizontal swinging pole near the rune to get to the closed off section of the upper level. Jump through the opening on the left and you’ll find an extra life. As you head down the stairs, go into the dead end corridor and break the wall on the left. You’ll find the Arachnotron toy behind it.
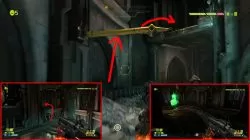
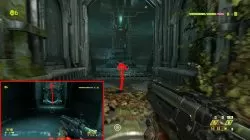
Once you’re at the bottom, use the poles to swing up and get the supercharge near the ceiling. Next stop is the central rotunda. Go out the right, then turn left and use the pole to jump across the abyss. Climb up the wall and turn around. You’ll see a codex page on a ledge.
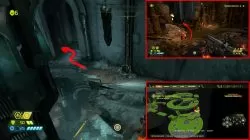
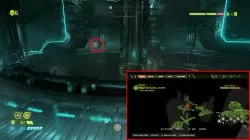
Go back to the platform from which you jumped and climb up into the big chamber next to it. Go forward into the dead end corridor and climb onto the box. Drag yourself up the ledge and you’ll see a codex page on the balcony across the room. You’ll need to air-dash around some walls to get there.
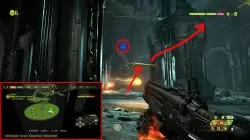
Drop down and head out the door on the left. Jump onto the platform and turn around, and you’ll see an extra life next to a climbable wall. Return to the central rotunda afterwards, and jump across the big hole in the room on the left. Turn left at the crossroads and you’ll find another codex entry.
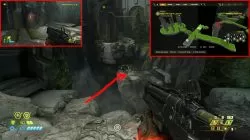
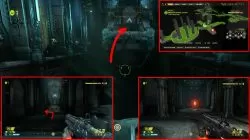
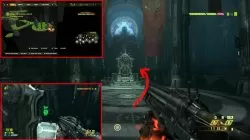
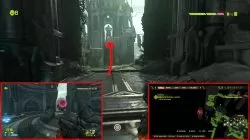
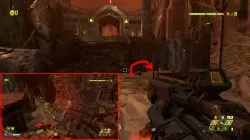
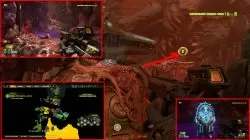
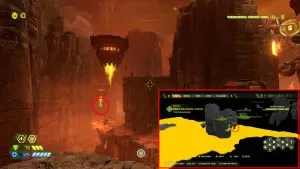
Head into the throne room afterwards and you’ll find an extra life behind the throne. Go back to the rotunda and head towards the area you’ve already explored. This time, use the poles to reach the lone tower in the distance. You’ll find a secret encounter there.
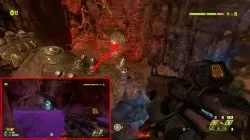
The next collectible is in the hell part of the level. At the start, drop down to the right and look for a narrow tunnel in the ground. Follow it and you’ll find the At Doom’s Gate album. Go into the flesh-lined cave and follow the corridors to the automap. Jump onto the climbable wall, then onto the ledge on the right. From there, you can jump and grab the extra life. Go back to the ledge and you’ll find a modbot.
Drop down at the giant gauntlet and head right. Lunge at the climbable wall, then turn left and lunge to the other one. Look behind you and you’ll see a codex page floating on the ledge.
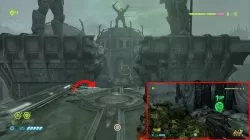
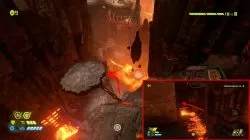
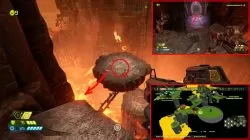
When you get to the ledge overlooking the giant stabbing another giant with a spear, head to the right. Jump across the pillars to the ledge under the stabber, and you’ll find a secret encounter hidden there. The next one’s at the cannon that shot the other giant. Stand on the top of the cannon and air-dash into the giant’s stomach. Turn left when you reach the purple pool, and you’ll find a crystal.
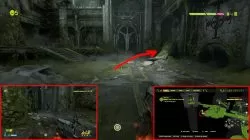
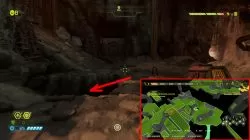
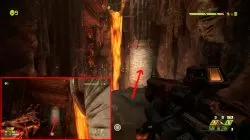
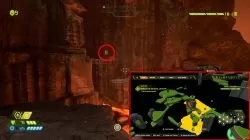
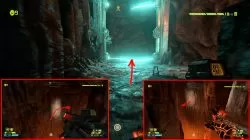
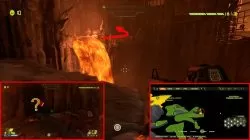
Once you reach the cliff that overlooks a sea of lava, with a disembodied spine in the distance, drop down to the lowest ledge and peer around the corner to the left. You’ll see a pole that allows you to get into the lava tunnel. Break the wall you find there and you’ll uncover a secret.

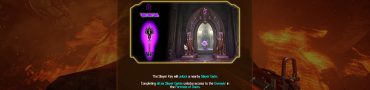
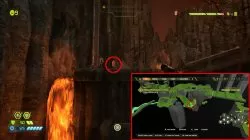
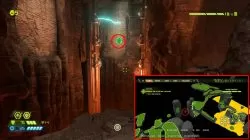
Go back to the ledge from which you swung and look to the left. You’ll see a codex page on a platform in the corner. Follow the path that leads past the flaming chains via the floating platforms. Enter the cave and ascend the ledges. Turn around and air-dash to the other side of the room. Look down from the cliff and you’ll see the slayer key on a platform. Take it, then turn around and you’ll see the slayer gate as well.
Go through the electic barrier and grab the climbable wall on the other side. Turn right and jump towards the other climbable wall. Jump onto the ledge on your left, then turn around. You’ll see an extra life behind another electric barrier.
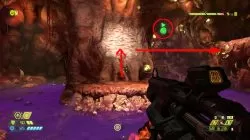
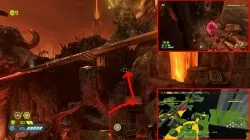
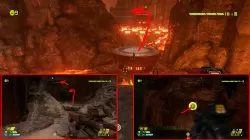
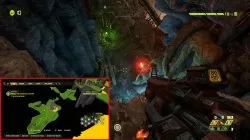
Follow the path until you reach a big drop. You’ll see a codex page at the bottom of the drop, it’s pretty hard to miss. Head along the cliff until you reach the lavafall on the right. Jump to the plaform beyond it, and follow the stream until you see a recess in the cliff face – there’s a Cacodemon toy in it.
The last collectible is another extra life, and it’s in the area with the bunch of floating platforms beyond the cave you just visited. It’s under the last platform on the left.
Previous Mission
Mission 1: Hell on Earth Next Mission
Mission 3: Cultist Base