Wooded Kingdom Power Moon Locations - Super Mario Odyssey
Power Moons in Super Mario Odyssey Wooded Kingdom are many; there’s plenty of this collectible in this area. There’s a total of 76 Power Moons in Wooded Kingdom: 54 you can collect initially, and another 22 end game Moons. The Wooded Kingdom is an interesting mix of dense woods and overgrown, seemingly-abandoned metal buildings, where Bowser wants to get flowers for the wedding. Its currency is in the shape of nuts, adding to the hardware vs nature duality. You’ll need to collect 16 Power Moons to leave this area. To help you out, we’ve put together out guide on Power Moon Locations in Super Mario Odyssey Wooded Kingdom.
We will also help you find all the power moons in Cascade, Sand, Lake, Wooded, Lost Kingdom, Metro Kingdom, Snow Kingdom, Seaside Kingdom, Luncheon Kingdom, Bowser’s Kingdom, Moon Kingdom, Mushroom Kingdom and Dark Side.
| Previous: Lake Kingdom Power Moons | Next: Lost Kingdom Power Moon Locations | ||
Story Moons in Wooded Kingdom
1. Road to Sky Garden – Defeat the giant Piranha Plant near the Iron Road: Halfway Point checkpoint flag.2. Flower Thieves of Sky Garden Multi Moon – Defeat Spewart at the top of Sky Garden Tower.
3. Path to the Secret Flower Field – From the “Iron Mountain Path, Station 8” checkpoint, head uphill and possess one of the tanks. Shoot the four Bowser faces from the green windmill nearby to get the Power Moon.
4. Defend the Secret Flower Field Multi Moon – You’ll face a flying saucer in the shape of a daisy. To start the battle, capture the Uproot and hit the ship in the mouth of the vacuum. After you defeat it, you’ll get the Multi Moon.
Super Mario Odyssey Wooded Kingdom Power Moons
5. Behind the Rock Wall – When you possess the tank for the first time, you have to shoot the black-brown wall and create a path to the top. However, there’s also a power moon hidden in the top left corner of the wall.6.Back Way Up the Mountain – Travel to Iron Mountain Path Station 8 Flag and jump into the small area to the right, with the Uproot in the middle. Capture it, then extend to destroy the blocks in the upper right corner. Go inside the new area you’ve uncovered and enter the warp pipe. Complete the 2D platforming section to collect the moon.
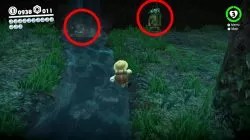
7. Rolling Rock in the Woods – Near the place where you land with the Odyssey, right against the wall to the northeast, there’s a small rock nestled among some bushes. Kick it around or hit it several times until it breaks open.
 8. Caught Hopping in the Forest – Not far off from where you land in Wooded Kingdom, you’ll run into a rabbit sleeping on a rock. Chase it and knock it with Cappy a few times to earn the Power Moon.
9. Thanks for the Charge! – Nearby the Forest Charging Station flag, you’ll see a line of robots waiting to be charged. Head to the charging station on the right and smash into it and collect the Power Moon.
10. Atop the Tall Tree – Southwest of the Odyssey, on the edge, is a small path that takes you to the plateau east of the Odyssey. Once there posses the Uproot and look for a tall tree with some wooden platforms on it. Use the uproot to reach the highest one and crack the nut to get the moon.
11. Tucked Away Inside the Tunnel – On the same plateau as the previous moon (you can also reach it by going to Summit Path flag and dropping down south) look for a stream coming out of a crevice. Capture an Uproot and follow the stream to its source. Extend to reach the platform above, de-possess the enemy, and smash the nut on the wall to receive another moon.
12. Over the Cliff’s Edge – Go to the plateau where you possess the tank during main quest story. There are several red platforms jutting from the wall, going around the building. Keep jumping until you reach the corner with three purple coins. Go around the corner, and you’ll see a small platform below, that you can jump down to. Go inside and complete a small platforming section. At the end, there’s another nut for you to break.
13. The Nut ‘Round the Corner – Once you get past the Sphynx, climb up the platforms to the left of the small pond. There, you can possess an Uproot, after knocking the flower pot of its head. Use the elongated legs to go behind the corner (towards the cliff). You’ll find a large nut on the wall. To get the Power Moon, simply smash the walnut with your head by stretching the legs of the Uproot.
14. Climb the Cliff to Get the Nut – Start from the Iron Mountain Path checkpoint, and jump into the small grassy area on the right. Then, go left and drop down to the lower platform. Look down from there, and you’ll see another platform below where another nut is. Crack it open and pick up the collectable.
15. The Nut in the Red Maze – Go to the area with the pillars moving up and down (where the three Piranha Plants are, at the Iron Road: Entrance checkpoint flag). Start climbing up the platforms, and you’ll run into an Uproot you can capture. Near the three gray blocks at the top of the section, there’s a platform that you can push up by extending the Uproot. Once inside, climb up the three “steps” to the right, then stretch up to smash the nut on the wall and receive a Power Moon.
16. The Nut at the Dead End – After you’ve killed the giant Piranha Plant and started Flower Thieves of Sky Garden, look right of the platform the plant was on, then down. You’ll notice a little section where you can drop down and capture another Uproot. Possess it and head left and around the corner. Break the nut at the end of this section to get the Power Moon.
17. Cracked Nut on a Crumbling Tower – Once you get rid of the Giant Piranha Plant and get the Road to Sky Garden Moon, step on the P-Button to create a path forward. From the next platform, head right, across the crumbling, yellow path. On top of the tower you arrive at, you’ll find a nut that you can break. The Power Moon is inside.
18. The Nut that Grew on the Tall Fence – Travel back to the Station 8 flag and jump into the area with the Uproot. Capture it and stretch back up to the flag. From there, walk over to the corner where the robot is, and carefully jump down on the wall. Climb over the protruding part, and you’ll find yet another nut to crack.
19. Fire in the Cave – From the Iron Road Entrance checkpoint, climb up the stairs and, instead of going to the maze, go down the path to the left of it. Throw Cappy on the scarecrow and go into the cave. Kill the Fire Bro in there to get the moon.
20. Hey Out There, Captain Toad! – Go to the Secret Flower Field Entrance and hop onto the P-button. Complete the timed platforming puzzle to unlock the Observation Deck area. From there, possess the Glydon and fly to the east and onto the lonely platform. Talk to Captain Toad.
21. Love in the Forest Ruin – Head to the right from the Forest Charging Station flag, and you’ll end up in a field full of Goombas. Possess one of them, then jump on another Goomba to start a Goomba Tower. Once you’ve got all the Goombas into the tower (use the stone platform in the middle to help you), walk over to the Girl Goomba with the broad red hat.
22. Inside a Rock in the Forest – Possess one of the tanks and drive it back towards the Odyssey. There’s a large rock slab just east of the ship. Blow it up with the Sherm to get the moon.
23. Shopping in Steam Gardens – You can simply purchase this Power Moon from Crazy Cap in Wooded Kingdom. It costs 100 Gold Coins.
24. Nut Planted in the Tower – When you enter Sky Garden Tower, on the first elevated platform, there’ll be an Uproot. Capture it and use it to reach the top of the six gray blocks above, then climb over to the P-Button. Follow the path of flowers up to the halfway point and jump into the alcove, then break the nut above.
25. Stretching Your Legs – From the previous power moon, climb up to the top of the spire inside the tower and stretch upwards to collect the Power Moon.
26. Spinning-Platforms Treasure – Start from the Secret Flower Field Entrance flag. Turn around and hug the left wall until you reach the yellow pole. Use it to climb on top of the wall. Where the wall winds to the left, you can see a platform below where you can drop down to. Head left, and you’ll come across two windmills that you’ll have to jump across to the other side. Go inside the warp pipe and break the nut in the new secret room.
Deep Woods Power Moon Locations
The Deep Woods is a hidden area in Wooded Kingdom. First off, make your way to the Iron Road Halfway Point checkpoint. From there, turn south and do a leap of faith into the void. If you pull it off right, you’ll be in the Deep Woods area. Beware the T-Rex roaming this place. 28. Rolling Rock in the Deep Woods – When you make your way into Deep Woods, turn around, and head down the path. Keep looking to the left, and you’ll find a small rock that you can kick around for a bit until it breaks (much like point 7).
29. Glowing in the Deep Woods – There’s a scarecrow you can find in this area. It’s next to a small pond that you can find if you follow the small stream. Capture him with Cappy, and a platform with the moon will appear uphill and to the right. The time limit is extremely tight, so you should use the Long Jump move repeatedly (ZL + B while running) to get there in time.

 EDIT: The sequence above describes how we got the Power Moon. However, the puzzle is randomized, so the sequence of pipes will be different for each player.
31. By the Babbling Brook in the Deep Woods – To the left and up the hill from the scarecrow, just behind the robot that dispenses seeds, there’s a huge stone block that you have to destroy. We did it by possessing the T-Rex and crushing it. Underneath, there’s a glowing patch of soil that you can Ground Pound to earn the collectable.
32. The Hard Rock in Deep Woods – Look for the soil pipe (the one where you can plant the huge seeds) that’s closest to the ledge, next to a tree that has fallen over and is hanging above the precipice. Turn your back to the pipe, and you’ll see another bunch of stone blocks that you can destroy. Like in the previous point, we did this with the T-Rex. Ground Pound the glowing bit to receive the moon.
33. A Treasure Made from Coins – Capture the Coin Coffer that’s on the tiny knoll (go down from the top warp pipe, near one of the seed-dispensing robots). Capture it, then go to the small pond that the stream forms. There’s a tiny plant growing in there. You’ll have to shoot coins at it. A total of about 500 coins, in fact. When the flower finally opens, climb the nearby fir tree, then hit B to jump to the moon.
 34. Beneath the Roots of the Moving Tree – From the pipe and fallen tree, you can spot a fake-looking tree on top of some steps (it has a large green button on top, you can’t miss it). You can capture this tree, and move it a bit towards the ledge. This will reveal a small glowing patch that you can Ground pound and get the Power Moon.
 35. Deep Woods Treasure Trap – From the soil pipe described in point 32, look to your right, and you’ll find an enormous tree. Walk around it and you’ll find a warp pipe leading inside. You’ll see three treasure chests that you have to hit in the correct order: middle, left, right. If you make a mistake, you’ll have to fight off some enemies.
36. Exploring for Treasure – Climb up the beanstalk in the middle and purchase the Explorer outfit and hat in the Wooded Kingdom Crazy Cap. Go back to Deep Woods and follow the stream (Babbling Brook, as it’s called). At the waterfall, you’ll see a gardener robot that you can talk to. He’ll open the red wooden door behind the waterfall. Open the chest in the room to get the collectable.
 37. Wooded Kingdom Timer Challenge 1 – Once you’re done with the main story, go back to Wooded Kingdom and travel to the Iron Road: Halfway Point. There’s a scarecrow nearby that you can capture. This wills begin a short platforming bit that requires you to spin on bars and jump to the next one. It’s not too difficult.
38. Wooded Kingdom Timer Challenge 2 – After you’ve defeated Bowser, you can go back to the Forest Charge Station. There’s a scarecrow on in the charger on the left. Throwing Cappy on its head will start a short platforming challenge, at the end of which you’ll get the moon.
39. Flooding Pipeway – From the scarecrow mentioned above, jump down to the pond on the left and dive in, then go through the Warp Pipe. You’ll then have to navigate your way through a short 2D platforming section in a pipeway that constantly fills and drains of water. This Wooded Kingdom Power Moon is at the end of the pipeway.
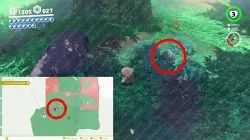
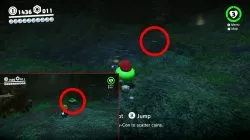
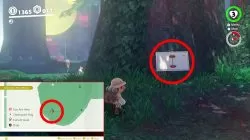
40. Flooding Pipeway Ceiling Secret – While in the Flooding Pipeway section, you’ll come across the highest platform, with three coins above (pictured below). When you jump to reach them, you’ll notice that there’s a secret chute above. Do a Ground Pound Jump to reach inside, then Wall Jump all the way up to get the moon.
 41. Wandering in the Fog – From the Forest Charging Station checkpoint flag, climb the red pillar (the one with four Question Blocks at the bottom), and capture the rocket. In the new section, you’ll have to collect five Moon Shards. The first one is near the landing spot. Across from the landing spot, there are two platforms leading downwards, and towards a shard. Back at the rocket, follow the path on until you reach the two Paragoombas (the flying ones). Possess one of them and collect the Shard between them. Fly of the jutting edge towards the next platform, turn left, then fly to another platform, with the shard on it. Fly back to the platform where the rocket landed, then underneath, to collect the final shard.
42. Nut Hidden in the Fog – Complete the instructions from the previous point until you reach the location of the final shard. Then, fly to the left, and you’ll arrive under another part of the construction. Fly over there, and you’ll spot a lone Paragoomba hanging around, with a small alcove containing another nut. Touch down on the concrete and smash the nut to get the power moon.
43. Flower Road Run – To access this area, go to Summit Path but, instead of going uphill, go around the ramp on the right. Then, wall jump up through the part with the coins. Once at the top, go through the red door. In the new section, simply activate the P-switch and follow the Flower Road. Repeat when you reach the next switch. At one point, the flower road will tilt upwards at a right angle, so be prepared for some wall-jumping. The Power Moon is waiting for you at the end of this course.
44. Flower Road Reach – Once you’re in the Flower Road area, step on the first P-button, but this time, make sure to build a Goomba Tower out of all eight Goombas you run into. That’ll let you reach the platform with the moon, which you might’ve noticed if you played through this section before.
45. Elevator Escalation – Go to the Summit Path flag and start climbing, but, instead of climbing all the way up, stick to the right side, and you’ll find another secret red door. Once inside, possess the Sherm, blow up the cage, and drive onto the P-button. Do not let go of the Sherm until the end of this sequence. In the next part, clear the area of enemies, destroy another cage, and activate the P switch. You’ll go down another level where you have to do the same. After that, you’ll have to clean up the other Sherms in this area and shoot your way through the rocks to reach the end of this section and your power moon.
46. Elevator Blind Spot – Get to the secret red door described above and possess the Sherm there. However, instead of shooting the cage, turn around and inspect the opposite wall. There’s a bit of rock up there; the area is lit up a bit for you to notice it more easily. Shoot the rock slab to reveal the moon inside.
47. Walking on Clouds – Go back to the Secret Flower Field entrance after you’ve completed the main story. Get the seed from the robot nearby, then cross the plateau to the P-block. Complete the platforming puzzle quickly, with the seed in tow. Once you reach the top, you’ll be on the Observation Deck. Climb to the very top platform, and plant the seed. Climb the ensuing beanstalk. In the new section, capture the Uproot and use it to get to the end of the challenge and pick the moon up. If you fail at any point, you’ll have to start over from the collecting the seed.
48. Above the Clouds – Midway through the section described above, you’ll reach a point where you have to climb some red and green platforms, while racing with the floating platform below. Just before you drop back onto the blue floating platform, you’ll notice there’s a shadow among the golden coins. Stand on it and extend the Uproot to collect the hidden moon.
49. Secret Path to the Steam Gardens! – Travel to Metro Kingdom. Walk behind the Odyssey, and look over the railing. You’ll notice a little catwalk that you can get to, leading to a painting. Walk inside the painting. Welcome to the Iron Cage area! Pick up the Power Moon and warp out of there.
50. Found with Wooded Kingdom Art – Behind one of the trees south of where you park the Odyssey. On it, you’ll find an art hint. Board the Odyssey, and travel back to Sand Kingdom. Once there, you’ll have to go to the north of the Inverted Pyramid (the huge, white hexagon on the map). Find the pair of shrubs at the edge of the cliff and Ground Pound the earth in front of them.
52. Jammin’ in the Wooded Kingdom – After you’ve taken care of Bowser, make your way to Summit path, then leap of the railing next to the Binoculars. Way below, next to the stream, you’ll find Toad rocking out to music. he wants to listen to something along the lines of “Sky-high coins aplenty”. The solution is to play him the song Above the Clouds, which is track 75.
53. Wooded Kingdom Regular Cup – Once you’ve completed the main game, go back to Forest Charging Station in Wooded Kingdom and participate in the Koopa Freerunning race. Win the race to earn the Moon.
54. Peach in the Wooded Kingdom – You can find Peach and Tiara after you defeat Bowser. They’re chilling on the Observation Deck (see point 20).
Wooded Kingdom Moon Rock Moons
You should pay another visit to the Wooded Kingdom after you’ve completed the main plot of Super Mario Odyssey. Find the Moon Rock, and you’ll reveal the remaining 22 Power Moons. To find the Moon Rock, head to the wall on the right and keep following it until you run into the rock.55. High Up in the Cave – This power moon is dangling in the air in the cave connecting the Iron Road: Entrance section and the forest around Crazy Cap. The easiest way to get it is to capture an Uproot and stretch upwards to reach it.
56. Lost in the Tall Trees – Capture the Glydon on top of the Observation Deck. Look out into the trees, and you’ll see a crate hidden on a platform in the foliage. So, use the Glydon to fly over there, then de-possess it to break the crate. Then, possess the Glydon again and fly towards Summit Path to get the Power Moon.
57. Looking Down on the Goombas – Go to the Observation Deck and capture the Glydon. Pretty close to the location of the Goombette (see Power Moon #21), on the topmost part of the fence, there’s a nut hiding a Power Moon. Fly over there and smash the nut.
58. High Up on a Rock Wall – On the right of the Red Maze, there are three gray blocks. Capture an Uproot, and make your way onto those blocks. Then, stretch upwards to crack the nut above the middle block.
59. The Nut in the Robot Storeroom – Travel to the Iron Road: Entrance warp flag. Possess an Uproot, then head over to the room where you planted the seed and grew the plant leading upwards to Forest Charging Station. Stretch up to break the nut that’s above and to the right of the door.
60. Above the Iron Mountain Path – Warp to the Observation Deck and possess the Glydon. Then, face the direction of the pond, the one near which Talkatoo is hanging out. As you’re approaching the moon, don’t forget to press up to fly down. Otherwise, you’ll fly over it.
61. The Nut Under the Observation Deck – Go to the Iron Mountain Path checkpoint and capture the Uproot. Waddle over in the direction of the P-button that makes the path towards the Observation Deck Area, but don’t step on it. Go around the corner to the left and go near the railing left of the rocks. Stretch upwards, and you’ll find out that there are four hidden blocks up there. Climb on them, then stretch up again to break the nut and reveal the Power Moon.
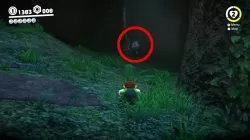
62. Bird Traveling the Forest – To earn this Power Moon, you’ll have to hit the glowing bird flying around the Wooded Kingdom. It goes around Iron Road and Sky Garden Tower. Watch how it flies and patiently wait for it to approach you close enough, then throw Cappy at it.
63. Invader in the Sky Garden – Go back to the area where you defeated Spewart, on top of Sky Garden Tower. There’s a huge machine on top of it, called a Yoofoe. Its weak spot, the huge purple button, is well outside your reach. So, you’ll have to build a Goomba Tower, while dodging the projectiles the Yoofoe fires at you. After the first hit, the machine will become more aggressive. Since it will grow spikes, you can now build a Goomba Tower, then de-possess the Goomba to launch yourself towards the button. The Yoofoe will go down after a few hits, and earn you the Power Moon.
64. Hot, Hot, Hot from the Campfire – Right next to Talkatoo’s perch, there’s a resident of Luncheon Kingdom trying to build a campfire. How do you help it out? You possess a Fire Bro, of course. You can either get the one on the ledge above the Iron Road: Entrance, or the one in the cave where the waterfall is, your choice. Navigate back to tthe fire, shoot it with a fireball, and you’ll get the power moon as a reward.
65. Wooded Kingdom Timer Challenge 3 – Make your way to the Station 8 checkpoint flag, and jump to the ledge with the scarecrow. Throw Cappy onto the scarecrow, then complete the platforming section and collect your moon. You’ll have to do a tackle jump from the last platform to get it.
66. Moon Shards in the Forest – Inside the red maze, there are five Moon Shards for you to find. They’re all pretty straightforward. The only one that might give you some trouble is the one hiding near the nut from Power Moon #15. When you find them all, exit the maze on the left side to get the Power Moon.
67. Taking Notes; On Top of the Wall – The wall in question is the one circling around the forest where you land with the Odyssey. Specifically, the eastern side. There’s a treble clef up there. When you walk over the treble clef, start rolling immediately. You’ll have to do that in order to collect all the notes in time. Don’t try to get any more speed by shaking the controller, you don’t need it.
68. Taking Notes: Stretching – This treble clef is kinda hard to find, and you’ll need to capture an Uproot to get it. Travel to Iron Mountain Path, Station 8, jump into the small grassy area and capture the Uproot. From there, go over the railing carefully. When you reach the area with the Firebro, head to the end of that platform to find the treble clef. Walk over it, then quickly collect all of the notes.
69. Wooded Kingdom Master Cup – Talk to the Koopa at Forest Charging Station to start the race. Win the race to earn the Power Moon. Tip: try and avoid using the Red Maze to earn a lot of extra time.
70. I Met an Uproot! – Go over to Iron Road: Halfway Point and stand on the P-switch. From the next tower, head to the one on the right. There, you’ll meet a Bonneter who wants to meet an Uproot. So, go back to Iron Road: Entrance, capture an Uproot, and make your way back to the Bonneter to earn a moon.
71. Invisible Road: Danger! – To enter this area, go to Secret Flower Field Entrance. Go back a bit, and you’ll see a Moon Pipe that’s just next to where you collected Power Moon #3. To reveal the invisible platforms, you’ll have to capture the poison plant and spit poison to reveal the platforms. Then, use Cappy to clear the poison as you go along. Pay special attention to the rotating platform. Right after the second poison plant, there’s a gap that you need to be wary of, as well. At the end of the run, kill the tree big poison plants by hitting them with Cappy to stun them, then jumping on their heads. Try not to target the middle one first to avoid getting into a crossfire.
72. Invisible Road: Hidden Room – Go into the area described in the entry above and go through the section until you reach the rotating platform. Look off the edge of the platform, and you’ll notice a doorway on the far side. You can either capture the plant and spit poison to reveal the path, or simply do a dive jump of faith just as you’re lining up with the doorway. Collect the moon inside the hidden room.
73. Herding Sheep Above the Forest Fog – Go to the Forest Charging Station checkpoint, then head to the right into the area with the Goombas and into the Moon Pipe on the rock in the middle of the clearing. You’ll have to herd the sheep through the obstacle course and into the corral. The catch is, there are many places where the sheep can fall to its doom. Be super patient and don’t accidentally chase the sheep of the ledge. Every time you have to hit it with Cappy over a gap or onto an elevated platform, take your time and make sure the sheep is perfectly aligned. The trick is to let the sheep do most of the work; you just need to correct its course every now and again. Once the sheep is in the corral, you’ll get your Power Moon.
74. Herding Sheep on the Iron Bridge – Go to the corral mentioned in the previous entry. Look over the railing on the left, and you’ll see some platforms you can drop down to. Go into the warp pipe, and you’ll get another sheep herding challenge. You’ll notice a P-switch on the floor. When you step on it, it will create a bridge that lasts for about ten seconds. Make sure you move the sheep to the very edge before stepping onto the switch. Make sure to stay just behind the sheep and hit it with Cappy to the edge of the bridge to gain some time. When it reaches the edge of the bridge, hit it with Cappy in order to punt it into the corral. Make sure to keep the sheep going in a straight line.
75. Down and Back Breakdown Road – Warp to the Iron Road: Entrance checkpoint and go into the Moon Pipe at the base of the moving columns. In this section, you’ll have to make your way to the end and pick up the key to unlock the moon at the very start. The area is infested with Bullet Bills, which will start destroying the blocks you walk on. You can capture one of the Bills to fly all the way there, but you don’t have to. Once you reach the end of the course, a Banzai Bill will start wrecking everything and chasing you back to the start. However, there’s a little trick to this, which we’ll explain in the following entry.
76. Below Breakdown Road – When you reach the end of the obstacle course described above, dodge the first Banzai Bill and jump onto the lower level of blocks. You’ll immediately get ambushed by another Banzai Bill. Capture it, and ride it all the way back and through the huge stone wall to reveal a hidden Power Moon. From there, simply collect the previous moon.
| Previous: Lake Power Moon Locations | Next: Lost Kingdom Power Moon Locations | ||
#30 needs to be edited. When you get to the group of 5 pipes, it’s the one in the center, not the bottom right.
It is different for each player
Both nr. 26 and 51 are misguiding… There is no yellow poles anywhere near the secret flower field flag. Still cant find nr. 51
Did you finish the main game story? I think these might spawn only when you’ve done that.
Yeah I can not figure this out either, but now at work I am thinking you need to first go into the secret garden and exit it…
Yep, they only spawn after beating the main story. The P-switch doesn’t spawn until after you beat the game.
#49 seem to be a similar deal to the sand kingdom one. My painting leads me to the lake kingdom not the wooded kingdom. I assume like in the sand kingdom has something to do with which kingdom you chose first.
Found it!. Mine was in the snow kingdom. it can only be gotten after you beat the level. You have to poses the first cloud monster that you see where you first arrive in the kingdom and use him to blow a giant wooden block that leads up to the painting
Yo dude thanks legit I went to metro and it’s just bring me to seaside since I picked wooded before lake so thanks