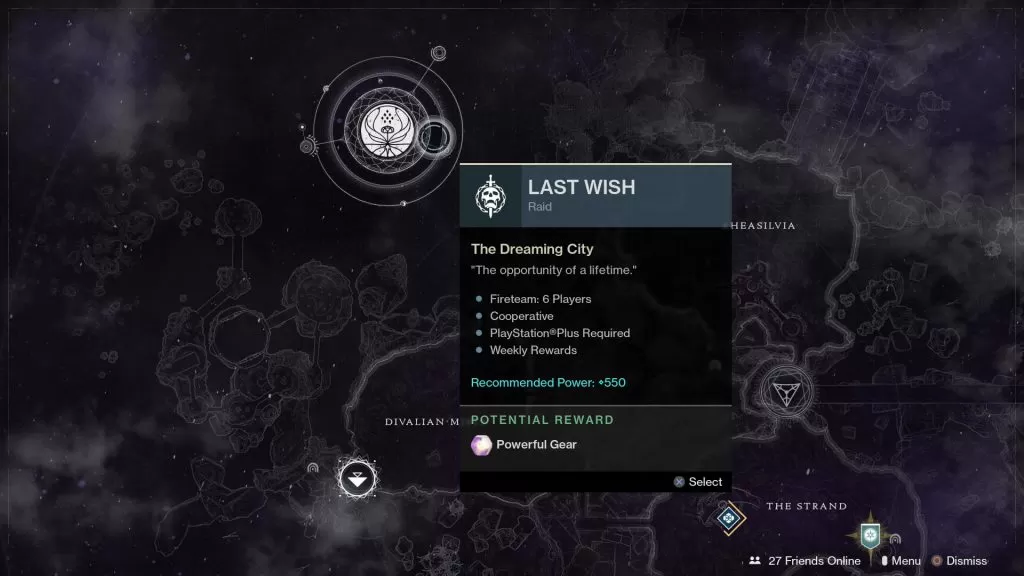
Last Wish Raid - Kalli, Shuro Chi, Morgeth, Riven - Destiny 2
Last Wish is the newest raid in Destiny 2. It was added in the Forsaken DLC, and it’s going to take place in the Dreaming City. The power level requirement sits at 520, but Bungie recommends 550 – this probably means the last boss will be around 550. Do not go unprepared. If you get stuck with any of the phases, our Destiny 2 Last Wish raid guide will help you by offering puzzle solutions and the best boss strategies.
In order to enter the raid, you’ll have to open up the Dreaming City from the director, then look for the icon in the upper left corner. Once you’re inside, you’ll have to go up and to the left, into a tunnel. Follow the tunnel until you reach teh Tower of Opened Eyes – that’s where you’ll fight the first boss
Destiny 2 Last Wish Raid Loot, Weapons & Armor – Destiny 2
How to defeat Kalli, the Corrupted?
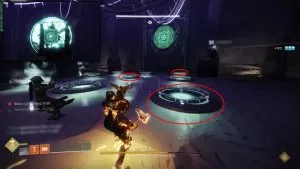
There are a bunch of round plates all around the room, with glowing emblems above them. Blight bombs will spawn on them. Trigger them by standing near, then run away before they blow. After you’ve triggered enough, a Taken knight will spawn. Kill it, and the plate will become cleansed – no more bombs will spawn.
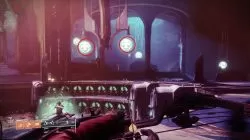
You’ll need to cleanse the six plates whose emblems correspond to the ones around the lowered part of the arena, where Kalli first appears. If you get it wrong, two ogres with 580 power will spawn in the middle as punishment. Make up names for the different symbols, then call them out – make sure there’s one player on each plate so you can complete it quickly enough.
Afterwards, Kalli will concieve an ontological weapon. This is a warning – if you’re not ready, your team could end up wiped. Run down into the arena and wait for the message that Kalli is preparing to wield her weapon. While you’re waiting, do as much damage as you can. When you get the message, the small doors on the sides will open. Run into the safe rooms beneath Kalli – one person per room. The doors will close once you’re in, shielding you from the wipe. After they’re open, repeat this cycle until the emblems appear again, then do the cleansing thing again.
How to beat Shuro Chi, the Corrupted?
Once you get to the First Spire, you’ll have to fight Shuro Chi. As soon as you’re in the boss room, you’ll get the Shuro Chi’s Song debuff with a four minute timer counting down. This will count down towards the wipe.
Kill the Eye of Riven Knight, and you’ll get a Taken Essence orb. Pick it up you’ll turn into a Taken Knight yourself. Three crystals will appear near the boss when you clear all the other enemies. Three players should run to the boss and interact with the crystals. When they point the lasers so that they form a triangle, the boss’ shield will go down.
Everybody should start nuking the boss then – supers, melting point, tractor beams, whatever you have. The taken player should keep track of the Taken Essence Anthumbra debuff – if it gets to x10, they’ll die. They have to use their super to revert back to their normal state and buy some time – it will push back the boss’ wipe attack. When you get a portion (1/6th) of the boss’ health, it will then teleport away, and you’ll have to repeat the whole process, but another player will have to take the Taken Knight Essence, to avoid dying to the debuff.
After the second try, you’ll have to run into the room with the pressure plates on the right. You’ll need to jump onto pressure plates to complete the images on the wall to close the door and protect yourself from the wipe. The plates do damage, so you’ll have to jump on them simultaneously. Look at the images (first the left, then the middle, then the right) to figure out which portions are missing – it’s a 3×3 grid, same as the pressure plates. Stand so the plates are between you and the image, then jump on them in the correct pattern. You cannot step on the same plate twice, which means you’ll have to switch things up after each image, or if you make a mistake.
Repeat for the other two images, and you’ll reset Shuro Chi’s Song, preventing a wipe. Then you’ll have to jump up several platforms and continue the fight outside.
How to kill Morgeth, The Spirekeeper?
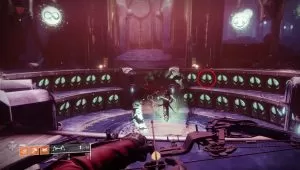
Once you’re done with Shiro Chi, you’ll have to climb and do some platforming, until you reach the big blog at the door. Everyone needs to stand around it for the fight to start.
Keep killing the adds, and glowing balls will start spawning. Collecting one will get you the Taken Strength buff. Having three of them will kill you. The boss will sometimes throw tornadoes at you – use the Taken Essence orbs from captains to free players trapped by these (grab the orb, approach the player and use the grenade).
Here’s the catch – when you free a trapped player, you’ll get their Taken Strength. You should have two players without any of those, dedicated to collecting the essence and freeing others. After they’ve freed someone, that someone then takes their place (no taken strength on them).

You will see messages saying the boss’ strength has increased from time to time. When a glowing orb appears in front of the boss (around 2 minutes after starting the fight), grabbing it will take away his immunity. Start spamming him – the more Taken Strength you have, the more damage you’ll do. Make sure everyone has two. If his strength reaches 100%, he’ll wipe the entire team. However, you can use the Taken Essence orb’s super attack to reset his strength counter. Do this when he’s at 90%, then repeat the entire process.
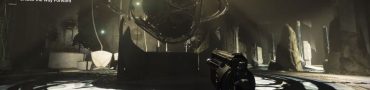
Vault Security Mechanism Puzzle – Unlock The Way Forward
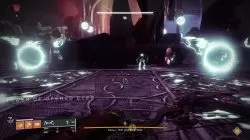
When you reach the top of the observatory, you’ll see a mechanism in the middle of a round room. Stand on the three glowing blue pressure plates around it, and it will start turning. You’ll get a debuff called Vault Security Mechanism – when its timer runs out, you’ll get wiped.
Enemies will start showing up, and you’ll have to clear them out. When an Eye of Riven appears, kill it and grab the Taken Essence orb, then quickly return to the central room. You may have to use the tunnels, since your room will probably be locked.
As soon as you grab the orb, a Might of Riven will spawn and make a bee-line towards one of the glowing plates. When he reaches it and sticks his sword into it, you will be wiped. You need to kill it before it does.
Use the orb (grenade attack) on the plate to cleanse it. There are symbols that appear on the mechanism when you stand at all the plates, and they indicate which order you need to cleanse the plates in. Call out your middle symbol, and one of the other plates will also have it. If it’s on the left, that plate needs to be cleansed with the Penumbra buff. If it’s on the right, with the Anthumbra buff. When one of you gets the Taken Essence orb, the rest will need to guide them on the correct plate, depending on the buff.
When you’ve cleared all three plates, the mechanism timer will reset, and you’ll have to redo the puzzle two more times.
How to kill Riven of a Thousand Voices?
When you reach the final boss, you might be intimidated by their size. Separate into two teams – one for each room. Just concentrate on the adds, and once the Eye of Riven appears, kill them. They’ll drop the Taken Essence orb. Have one player grab it, then tell the others which emblem appeared in front of the viewing platform. Another player should be up there on the platform, and they’ll have to guide the one with the orb to the appropriate emblem. The orb bearer should then cleanse the emblem, which will make the boss vulnerable.
When the boss does the tentacle attack, shoot the tentacle and the flaps will open, showing you a couple of small eyes that are glowing. Note them and call them out. When the boss appears in the second room and opens the flaps, shoot the mouth with all you’ve got, then shoot the eyes that were called out when they start glowing. This will make the boss retreat. You’ll move around through different arenas repeating this process, and at some point, you’ll end up in free fall. Shoot the glowing growths on the boss’ body while you’re falling.
Take the stone to Techeun – Queenswalk
After you’ve killed Riven, you’ll have to run a gauntlet in Queenswalk. You’ll get a special orb you’ll need to carry with you to the end. The stone will call out the name of the player that’s supposed to carry it. When they grab it, a timer will start. When the timer runs out, they’ll be transported to another realm. The stone will call out another name, and when that player grabs the orb, the timer will start again.
While the orb is being carried, it will form a bubble. Any player outside that bubble will start getting a debuff stack. Once the stack reaches 10, the player will die. This means the entire team has to stay in or near the bubble at all times.
The player in the other place should deal with the enemies swarming them while collecting Taken Strength buffs by going into the glowing balls. Each time they get Taken Strenght x2, it will reset the timer for whoever’s carrying the orb. It seems like the balls in the other place spawn when the players in Queenswalk kill elite enemies. Your goal is to have each player hold onto the orb as long as possible, so that the final carrier can reach the goal with it.
Thanks to u/dicKnows, the Sherpa community and Mtashed for all the additional info.
If you need further help with Destiny 2 Shadowkeep, check out our guides on Dead Ghost Locations, Jade Rabbit Locations, and Eyes on the Moon - How to Start Vex Invasion. If it's Exotic Weapons that you're after, we've got you covered with our Pain And Gain Exotic Quest and Deathbringer Exotic Rocket Launcher - Symphony of Death guides. Going back in time for new players, we can offer you guides like Ikelos Weapons - How to Get SMG, Sniper Rifle, Shotgun, or, if you're playing Forsaken content, guides like Corsair Down & Badge - Dead Body Locations.
Need to post the pictures for Riven’s Eyes. It’s very essential because one team will look at Riven’s Eye position calling out what direction and the other will need shoot the eye in the said direction. Where is L1? L2? R5? R3? So on, and so fourth. There 10 eyes, 5 of each direction
hey i found a secret room know anything about it HWH Borderptrol is my gt just curious if i was the first to but more importantly would like to solve it
Awesome thanks dude. Nice stream.