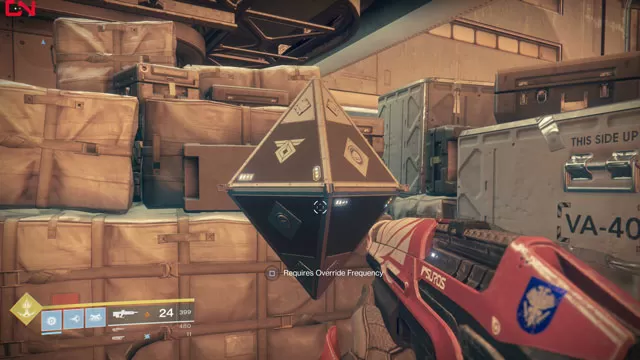
Destiny 2 Sleeper Node Locations - How to Get Override Frequency
Sleeper nodes are a type of collectible in Destiny 2. They’re floating pyraminds you’ll find scattered across Mars, and you’ll need to collect Override Frequencies to open them. You’ll encounter your first one long before you have the knowledge or the tools to open it. If you’re confused by the music boxes, or don’t know where to find them, our Destiny 2 sleeper node locations guide will help you.
How to get Override Frequency?
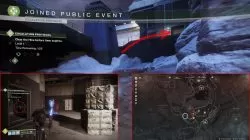
In order to get the first Override Frequency, you’ll have to complete the story campaign. Then you’ll have to finish the blue missions that appear on Mars – this will unlock the Nascent Dawn 1/5 pursuit. Finally, you’ll have to clear three patrols and a lost sector. This will grant you four Resonant Stems, which you can combine into an Override Frequency. Afterwards, you’ll be able to obtain more of them by looting high value target chests, doing patrols, public events and lost sectors. For more info on that, check out our guide on how to farm Destiny 2 Resonate Stems.
Each frequency is valid for one particular Sleeper Node. The description of the frequency will hint towards the location of the node. When you’re near it, you’ll start hearing faint music. It will grow louder as you approach the node, effectively leading you to it.
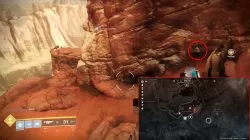
Descent Cavern Warsat & Descent Chasm Ledge
These two are both in the Olympus Descent area, in the south of the map. To get the first one, enter the cave from Glacial Drift and follow the tunnel until you reach the crashed warsat. Then jump down onto the ledge and follow it until you find the node. The second one is further down the tunnels, in the southwestern corner of the first open chamber.
Descent Caves Runes & Drift Subterrane Cliffside
The first one is in the Olympus Descent, to the left of the gate leading down to the Penumbral Depths. The second one is in Glacial Drift, right next to the entrance to the lost sector in the east.
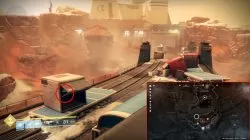
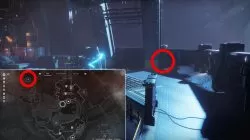
Drift Transit Freight & Drift Gatehouse Catwalk
The first one is on the bridge, in an opened metal crate on a blue rail cart. The second one is in the building at the end of the bridge. Climb onto the catwalk on the left once you’re in, and you’ll find it by the railing.
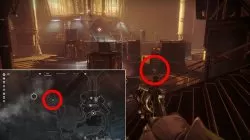
Drift Transit Foundation & Drift Service Backend
The transit foundation one is under the bridge, near the northeastern end. The service backend is in the building on the left. When you enter it, climb the ramp and turn around. Look for it on the ledge on the left.

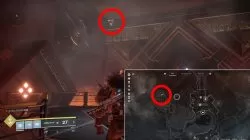
Drift Checkpoint Elevator & Drift Subterrane Chasm
The first one is in the building on the western side of the bridge. When you enter the ground floor, you’ll see two elevators – one functional, another with its doors open. There’s a small room near the entrance, and the node is in it. The second one is in the Ma’adim Subterrane lost sector, in the east of the area. It’s under the stone bridge in the cave.
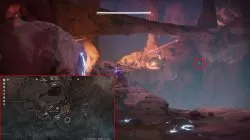
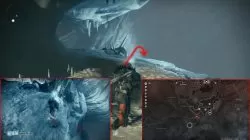
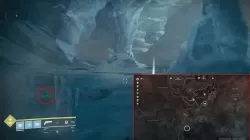
Dynamo Approach Tree & Dynamo Approach Cavern
Trek through Dynamo Approach until you find the big stone arch. There’s a dead tree there, and the sleeper node is next to the icy cliff side. Next, head into the small ice cave connecting Dynamo Approach and Alton Dynamo. Walk until you come across the first wider section of the cave, with many icicles hanging from the ceiling. Stand in the middle of the room, and look southwards, up and to the right. You’ll spot the node above you, hidden among the icicles.
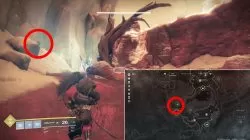

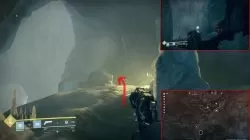
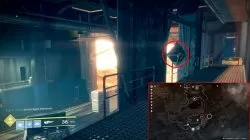
Dynamo Control Door & Dynamo Observation Door
Go inside the inner part of the Alton Dynamo. At the fork in the road, head left, towards the control room and other areas. Head straight through the white-lit room and through the next room. As soon as you go through the door, look to the right next to it to find the node. Once again, Cross the room into the hallway, and onwards. Eventually, you’ll enter a room with an Incendior right at the door. There’s a wall immediately left of the door that you can jetpack on. You’ll see the sleeper mode on a small ledge.

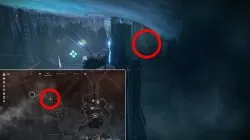
Dynamo Observation Valkyrie & Dynamo Observation Core
In the same room described above, in the north of Hellas View, go to the northernmost corner of the room to find yet another sleeper node. Then, exit through the nearby door into the small red room with a console and a broken door. Position yourself so that the console is on your right, then look into the upper left corner to see the sleeper node.
Dynamo Core Brace & Dynamo Core Catwalk
Proceed through the small red room described above into the Dynamo Core area. Head left immediately from the door, then jetpack to the higher platform across the gap. The sleeper node is right around the corner. The second sleeper node in the Dynamo Core is under the small bridge that leads from the entrance towards the large staircase and the core itself.

This article is under construction. We’ll update it with new locations as we progress through the game.
If you need further help with Destiny 2 Shadowkeep, check out our guides on Dead Ghost Locations, Jade Rabbit Locations, and Eyes on the Moon - How to Start Vex Invasion. If it's Exotic Weapons that you're after, we've got you covered with our Pain And Gain Exotic Quest and Deathbringer Exotic Rocket Launcher - Symphony of Death guides. Going back in time for new players, we can offer you guides like Ikelos Weapons - How to Get SMG, Sniper Rifle, Shotgun, or, if you're playing Forsaken content, guides like Corsair Down & Badge - Dead Body Locations.


hello. i am wertekson
Dynamo Vent frequency , is in the same vent you have to blow open fot the broken door which opens and closes a little in regular intervals. look to the right and up, and you’ll see a vent. Blow it open and fly up there. Crawl all the way through the vent until you reach a small room