Borderlands 3 Holy Spirits Intoxicated Ratch Liver Locations
Intoxicated ratch livers in Borderlands 3 are an optional quest step in the Holy Spirits mission. All you have to do is harvest five ratch corpses that have intoxicated livers to complete this Holy Spirits step. The problem here is that, since it’s optional, the game doesn’t mark the intoxicated livers for you, and the dead ratches blend into the scenery. If you’re having trouble finding them, our Borderlands 3 Holy Spirits Intoxicated Ratch Liver Locations guide is the right place for you.
Where to Find Intoxicated Ratch Livers in Holy Spirits Mission?
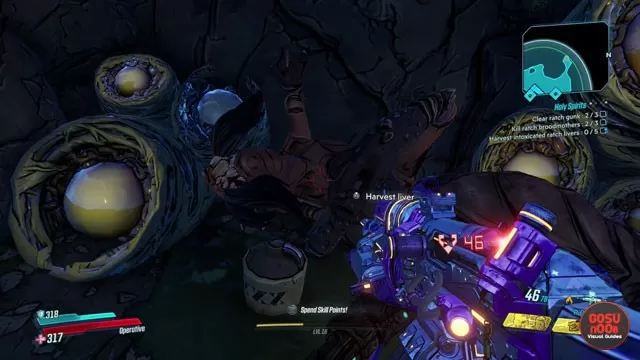
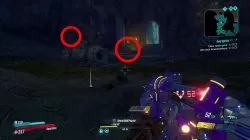
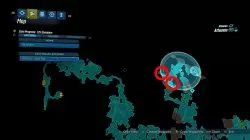
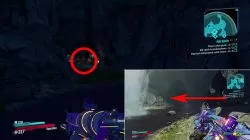
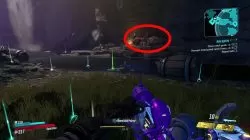
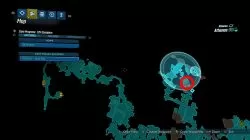
To find intoxicated ratch livers in the Holy Spirits Mission in Borderlands 3, you’ll have to find the corpses of five ratches. The first one is near the staircase in the cavern where you kill the first ratch broodmother, right next to the doorway leading towards the waterfall. Approach the corpse and complete the button prompt to harvest your first intoxicated ratch liver. Then, take the path leading left and up, and you’ll quickly spot the second ratch that’s ripe for liver harvesting.
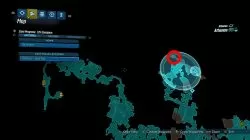
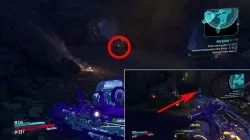
For the third intoxicated liver, go into the room with the waterfall. Go all the way behind the waterfall and to the left. You’ll come across an alcove where another dead ratch awaits disembowelment. Yes, I am making this grosser than necessary on purpose.
From liver #3, turn around and head straight into the next cavern, up the small staircase. The corpse will be immediately to the right as you enter the cavern, but it’s probably best to clear it of enemies before proceeding with the evisceration.

The fifth and final intoxicated ratch whose liver you’ll have to extract is in the cavern where you fight the Ratch Nest. It’s just off to the side, easy to miss with the adrenaline from the battle against the Nest.
The other steps of this mission are fairly easy to both find and complete. The game holds your hand with quest markers and the like, so the intoxicated ratch livers are the only thing that might give you pause. And, since it’s an optional step, you can forget about it completely, if you don’t care much for dissecting huge vermin.
Of course, the Holy Spirits mission is far from the only place where you might encounter problems in this game. Luckily for you, we’ve got a whole bunch of Borderlands 3 guides that you might find useful. For example, Killavolt Boss Fight – How to Solo Kill, Lectra City Underground Puzzle – How to Turn On Screens, and Target of Opportunity Locations Map
If you're having trouble with other things in the game, you might want to check out some of the other guides we've written. We've listed the locations of Red Chests, Typhon Logs, Dead Claptrap Parts and Hijack Targets. We've explored the mission choices, like what happens when you side with Holder or Ramsden in On The Blood Path, or when you tell Rhys to keep or lose mustache in Atlas at Last. We've also covered secrets, like the one where you have to open the Holy Broadcast Center locked door.